Rigging features
This documentation explains the set up for Rig 1.0, its controls, and features.
Blend File for Rig 1.0 #
Rig Structure and Features #
Armature Transforms #
These are the armature’s transforms in Object Mode with the controls’ setup. Do not edit this in any way. The rig should only be manipulated in Pose Mode. To avoid unwanted editing, the transforms have been locked in Object Mode.
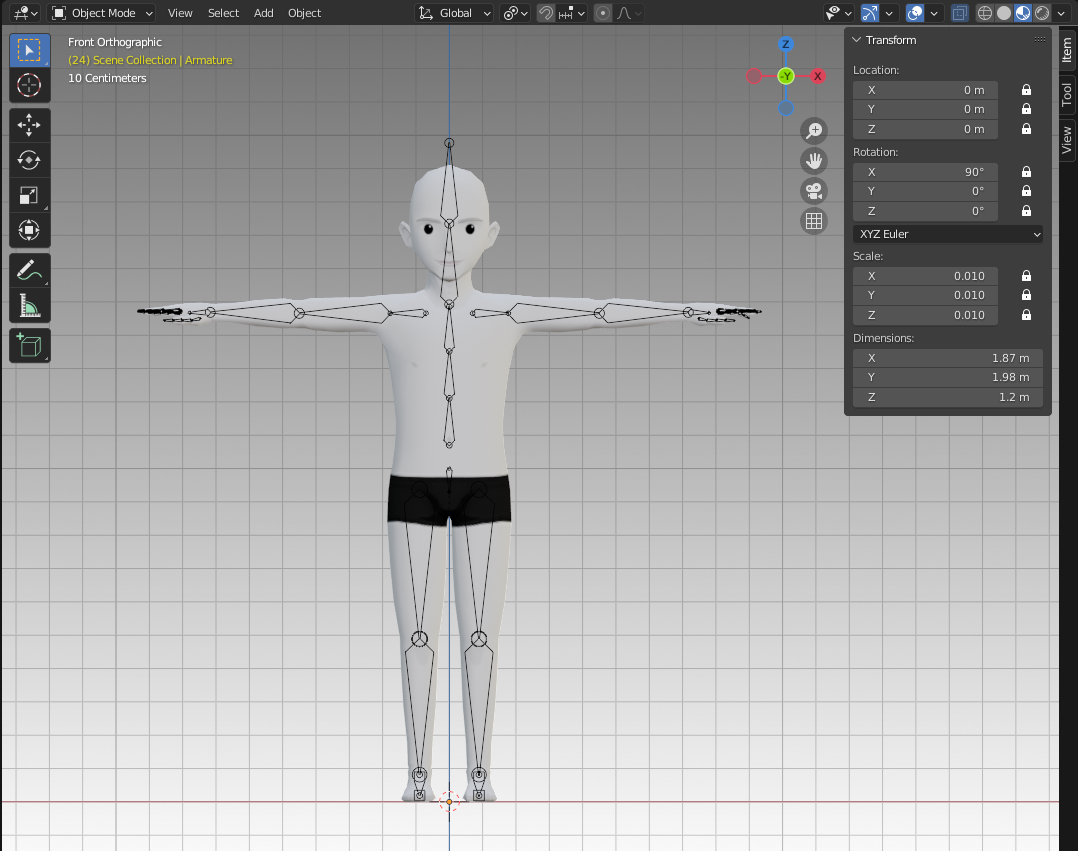
Rig 1.0 transforms.
Warning: Never edit the rig in Object Mode.
Bone Orientation #
This is the bone orientation for Rig 1.0. As it is right now, it’s not possible to mirror behavior on the shoulders, arms, hands, or fingers.
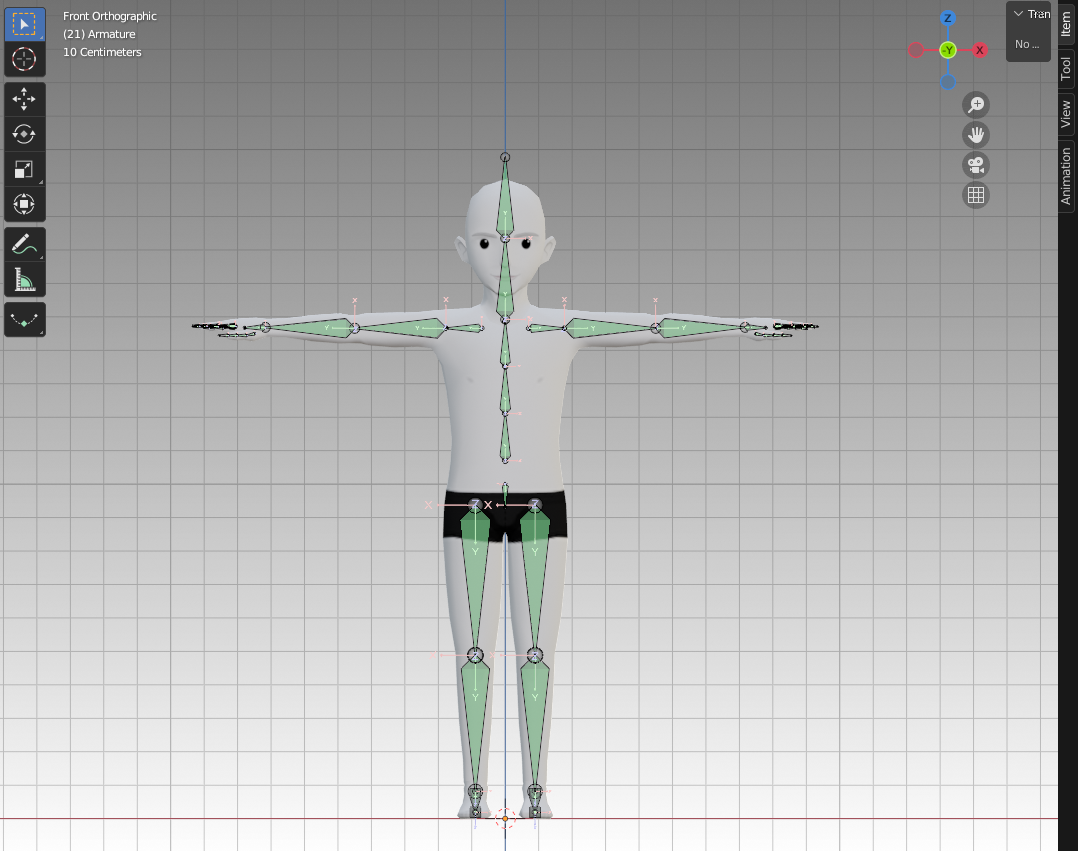
Axes for bone orientation.
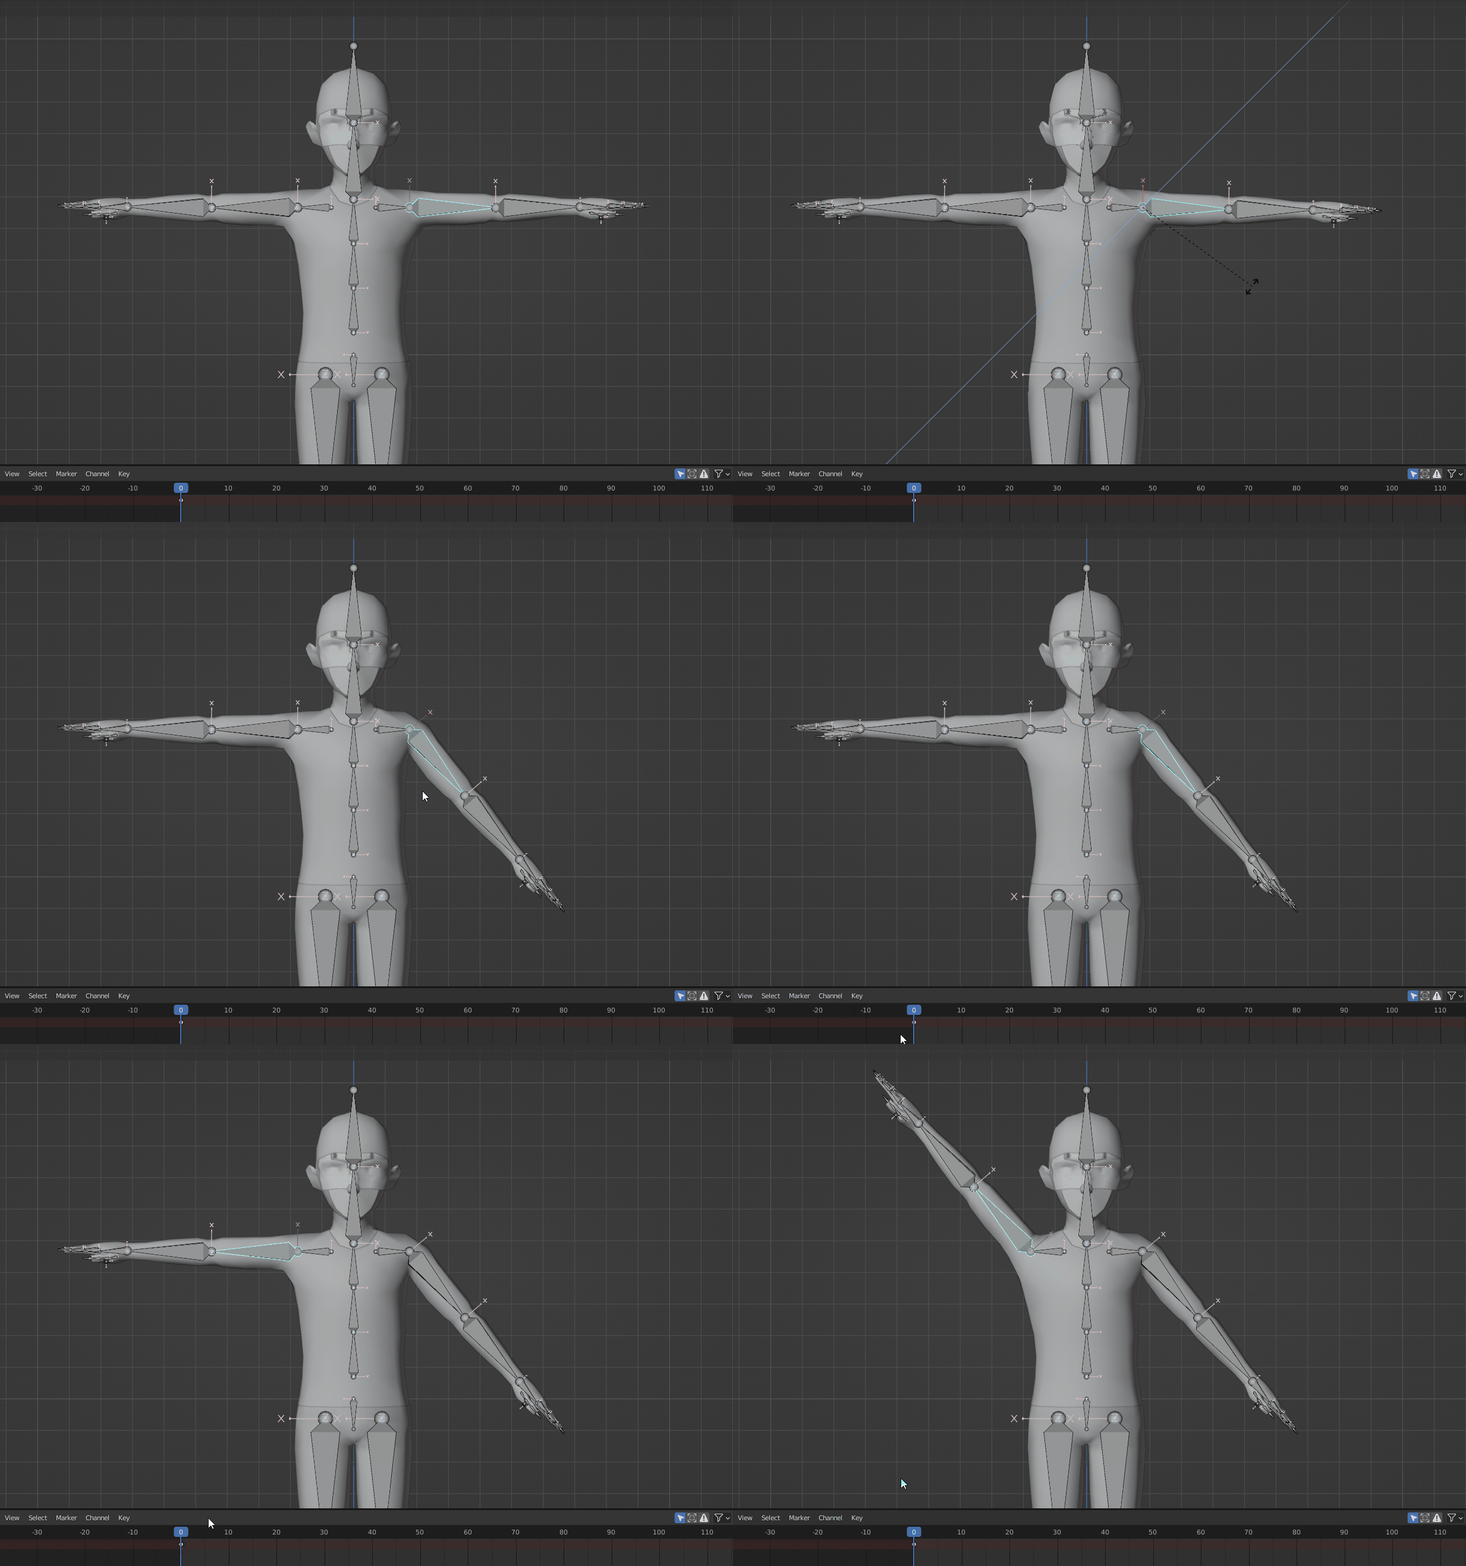
Behavior when mirrorring poses.
Layers #
To avoid any accidents and to make it easier to identify the controls, this rig is organized in layers that can be accessed in the Object Data Properties tab in Blender. The first set of layers (on the left) has all the controls needed for avatar animation. The second set (on the right) has constraint setups and the base skeleton; there’s no need to select those.

Object Data Properties tab.
This is how it’s organized:
- 1st Top Layer: here are the global controls, such as the root and spine ones, as well as shoulders. Controls with any custom attributes are also in this layer.
- 2nd Top Layer: has all the upper body FK setup controls.
- 2nd Bottom Layer: has all the lower body FK setup controls.
- 3rd Top Layer: has all the upper body IK setup controls.
- 3rd Bottom Layer: has all the lower body IK setup controls.
- 4th Top Layer: has the finger controls.
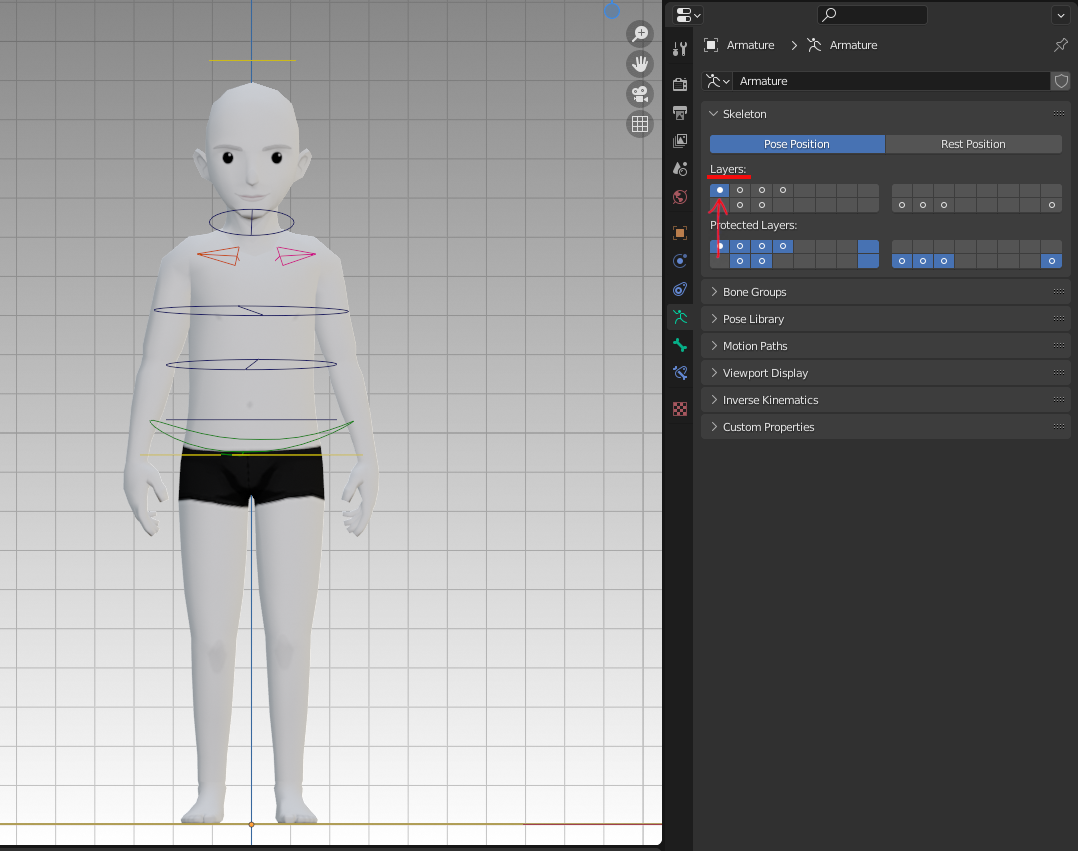
1st Top Layer.
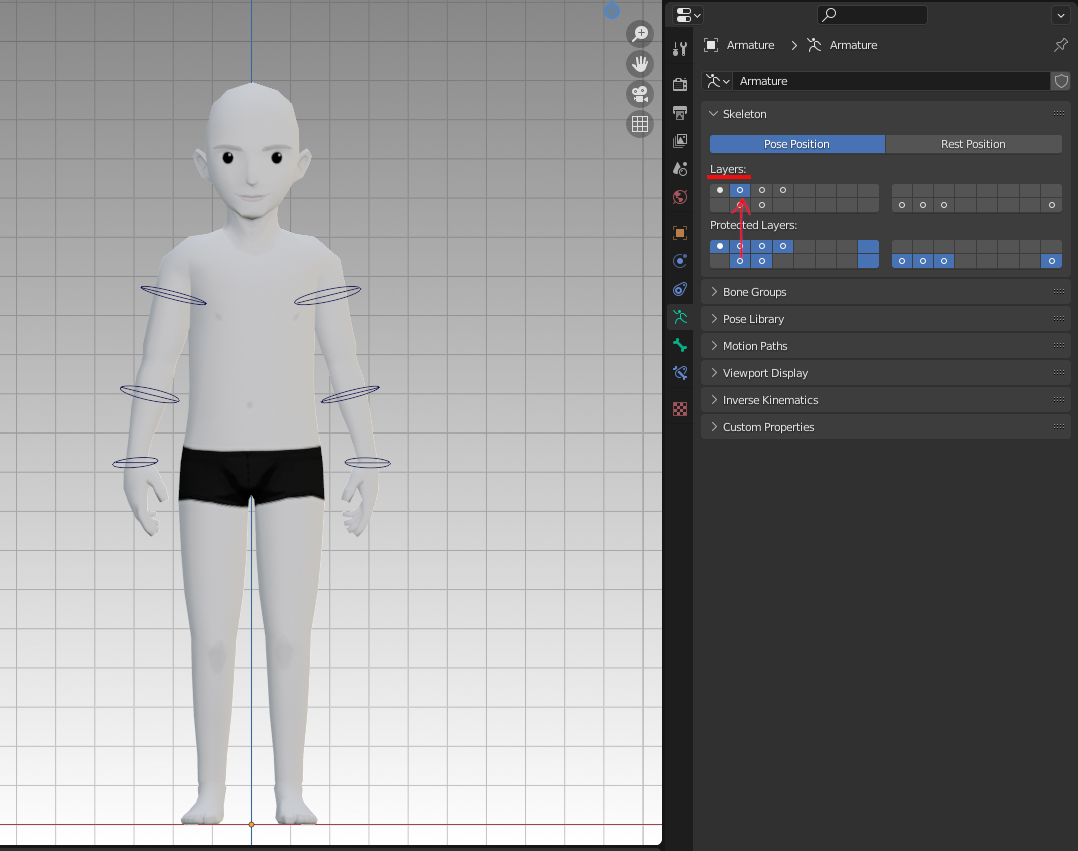
2nd Top Layer.
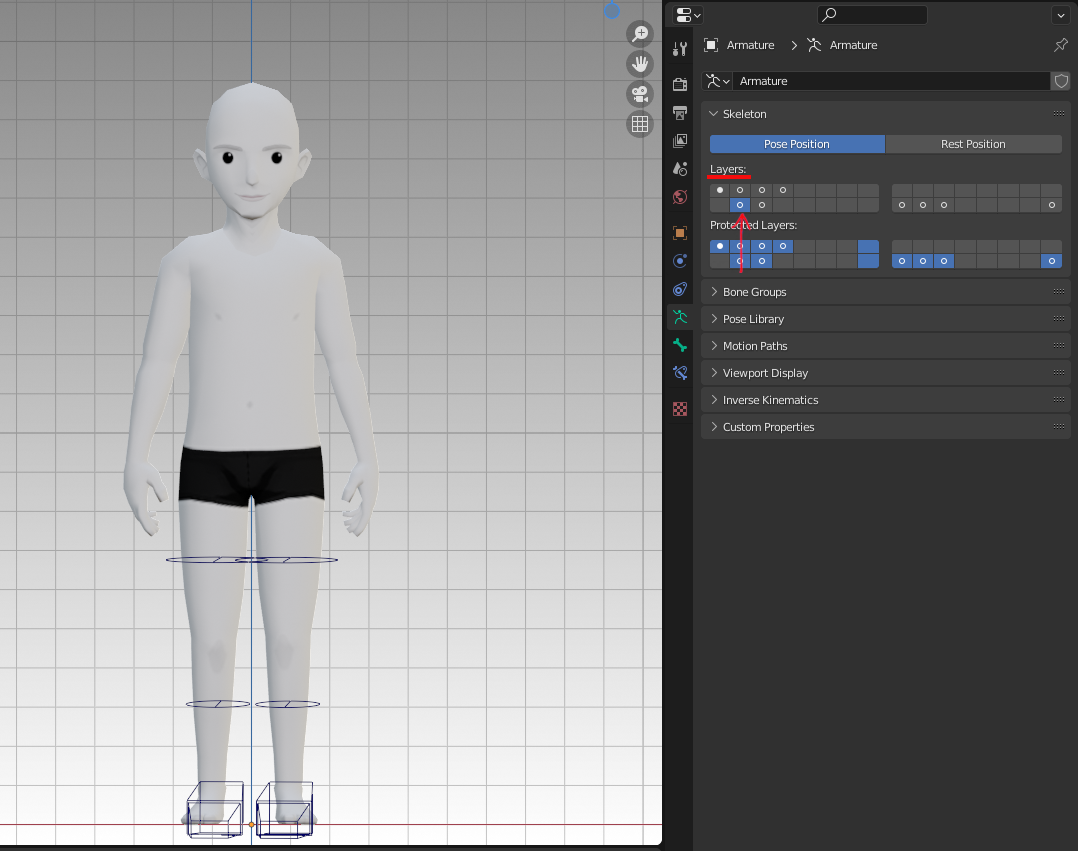
2nd Bottom Layer.
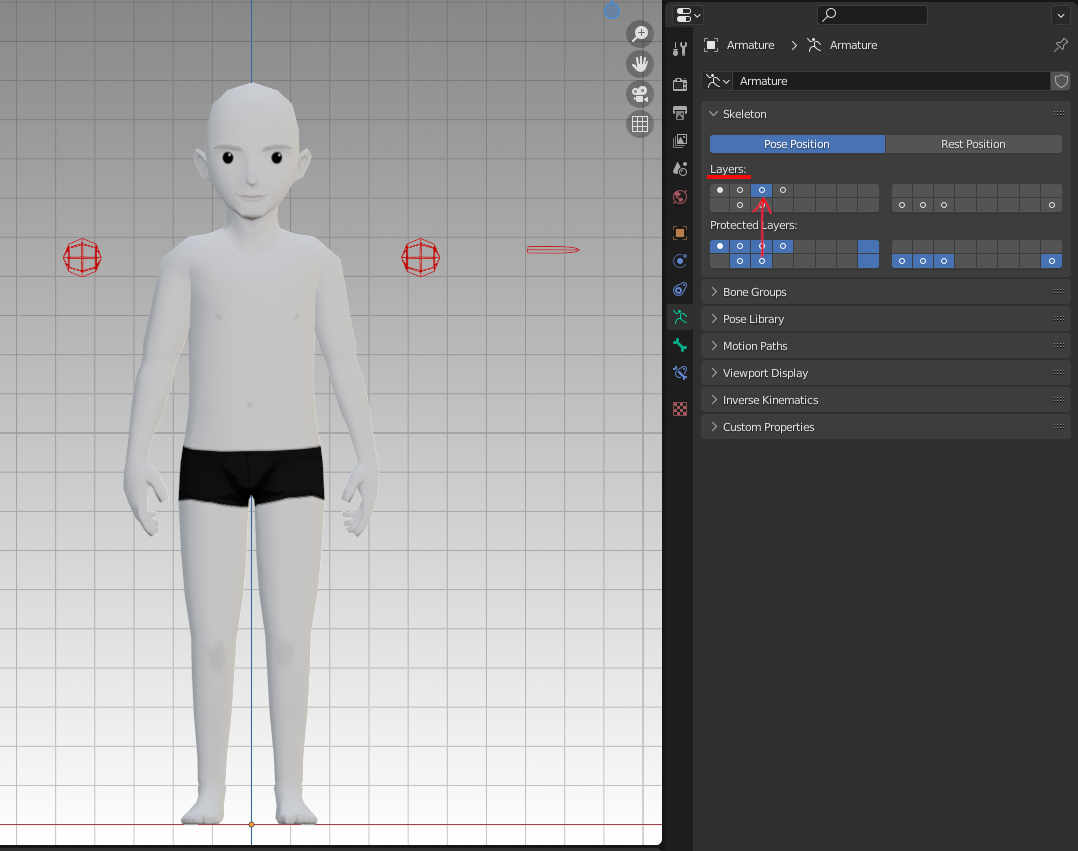
3rd Top Layer.
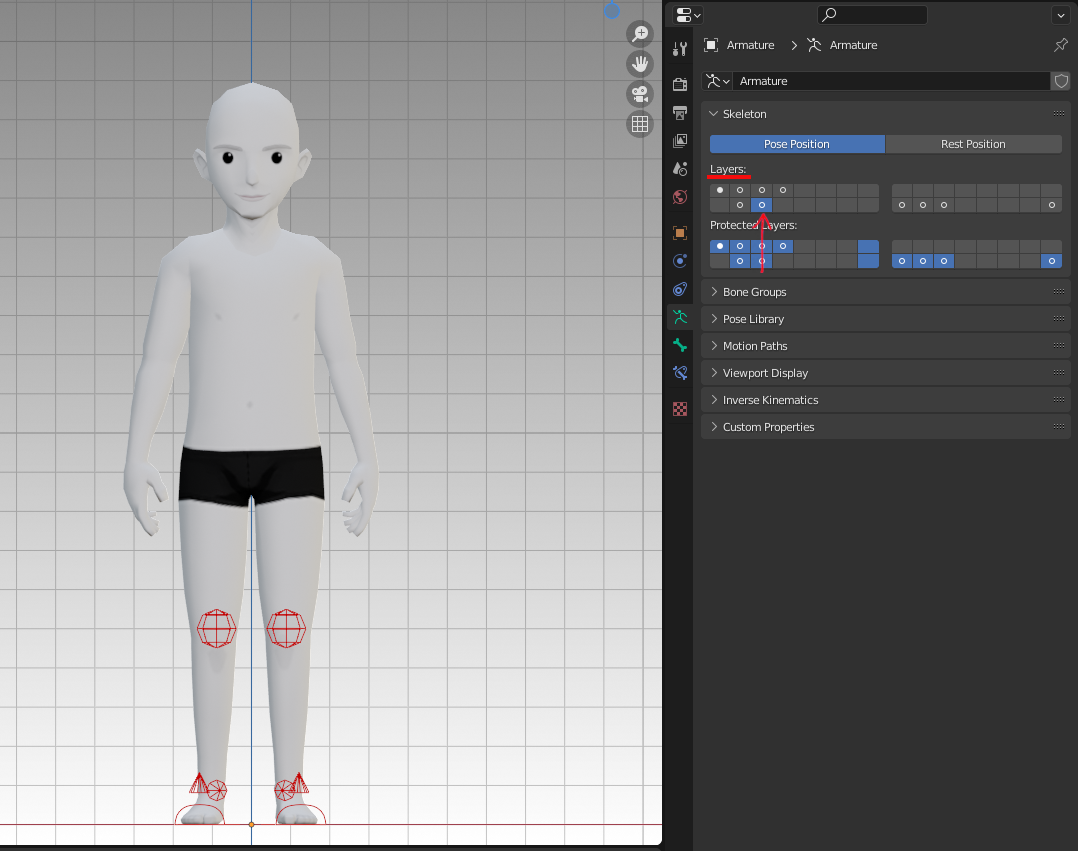
3rd Bottom Layer.
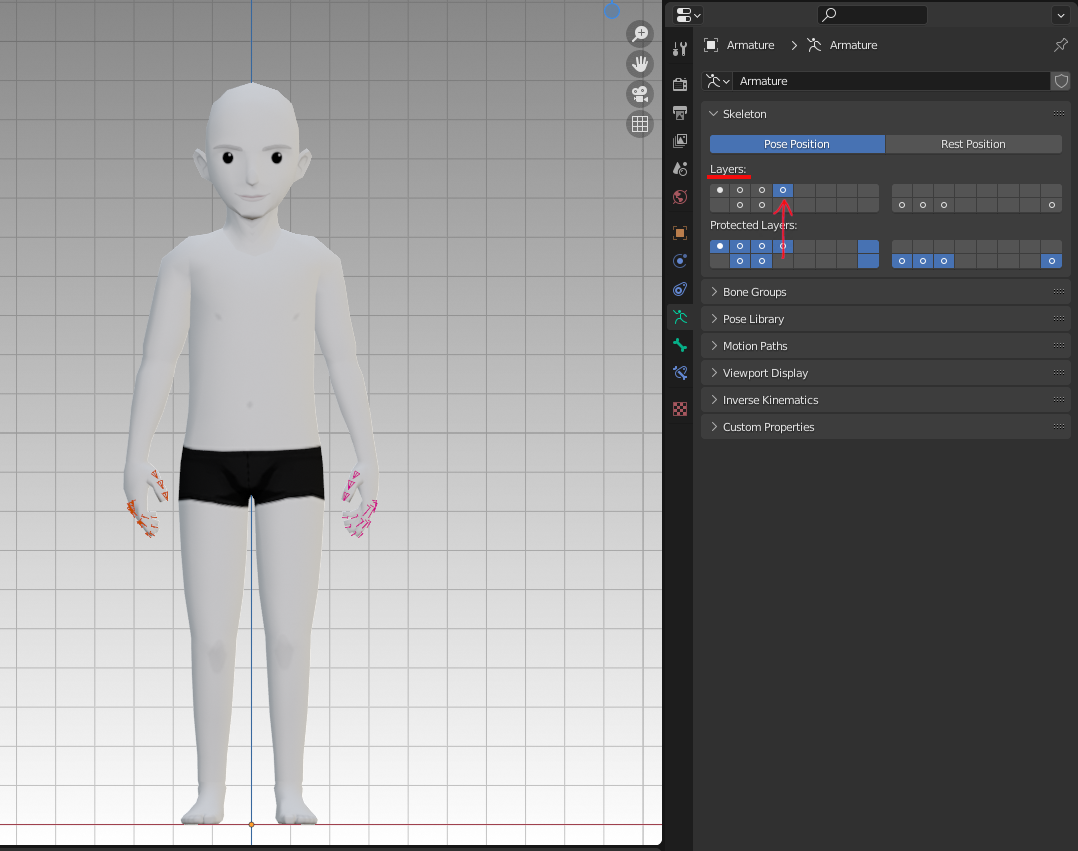
4th Top Layer.
To see all the controls together, select all of the first top four and bottom 2nd and 3rd. To work with separate groups, select just the one you need. While going through the layers, make sure you’re selecting only Layers.
Warning: Do not select Protected Layers.
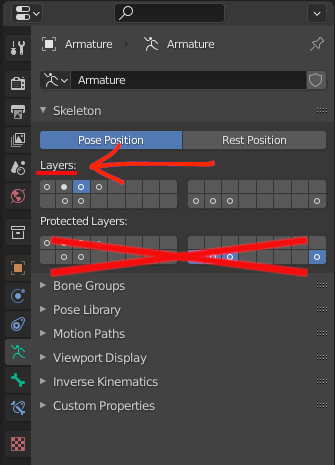
The first set of layers has all the controls needed for animating.
Controls and Grouping #
Controls are non-deforming bones that drive the base skeleton. They have different colors depending on their category:
- Yellow: global controls and controls with custom attributes
- Green: hip (easier to identify in the spine hierarchy)
- Blue: controls with FK behavior
- Red: IK controls
- Pink: left side controls
- Orange: right side controls
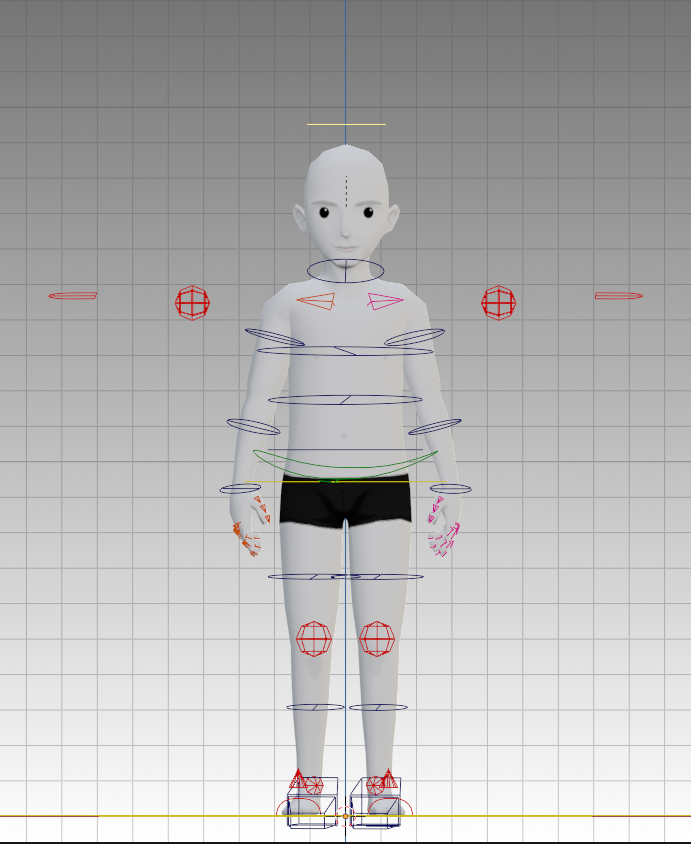
All the controls and their colors.
Custom Attributes and Setup #
FK/IK Blend #
Even though arms are usually set as FK and legs as IK, there are certain situations that will require a different setup. If the hand has to maintain a certain position, like during push ups or while climbing, the IK will be the best choice. As for the legs, while in the air, swimming or rolling, FK works best. For more flexibility and freedom in animation, this rig has an FK/IK blend in the UpperBody control, being 0 completely FK and 1 completely IK. Any other value in-between will be a blend of the two.
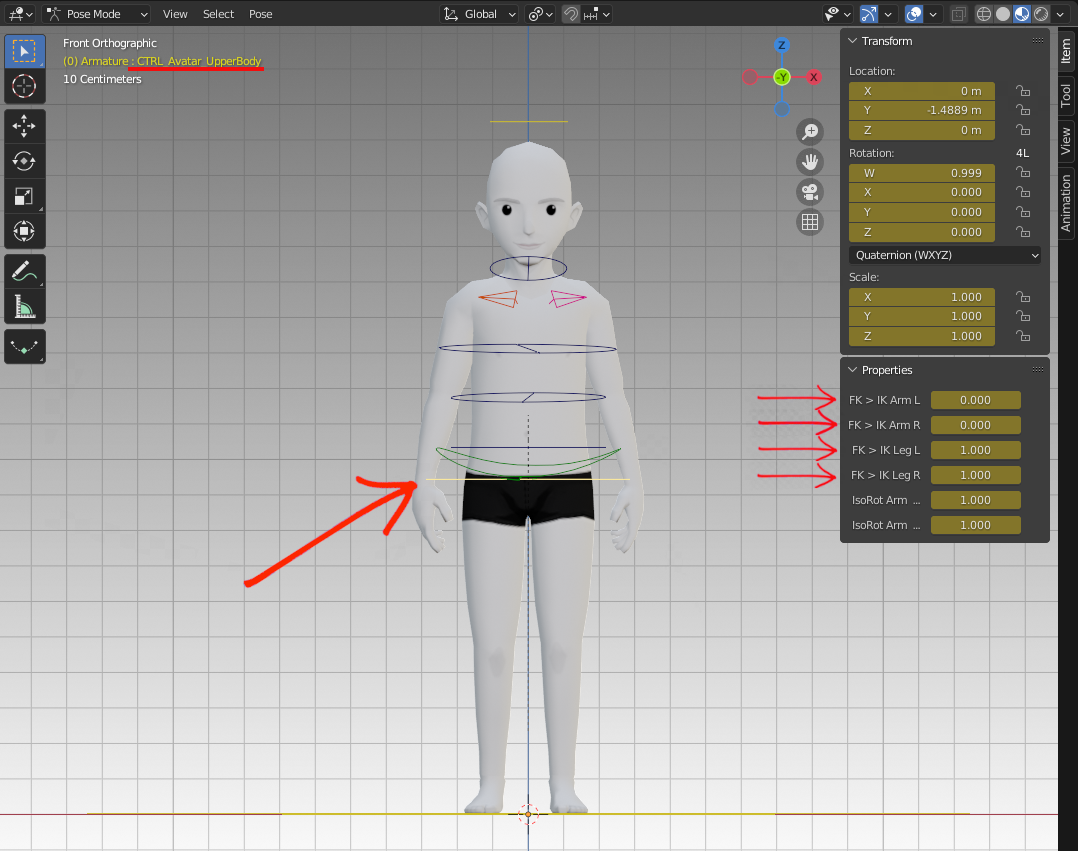
FK/IK blend for both arms and legs.
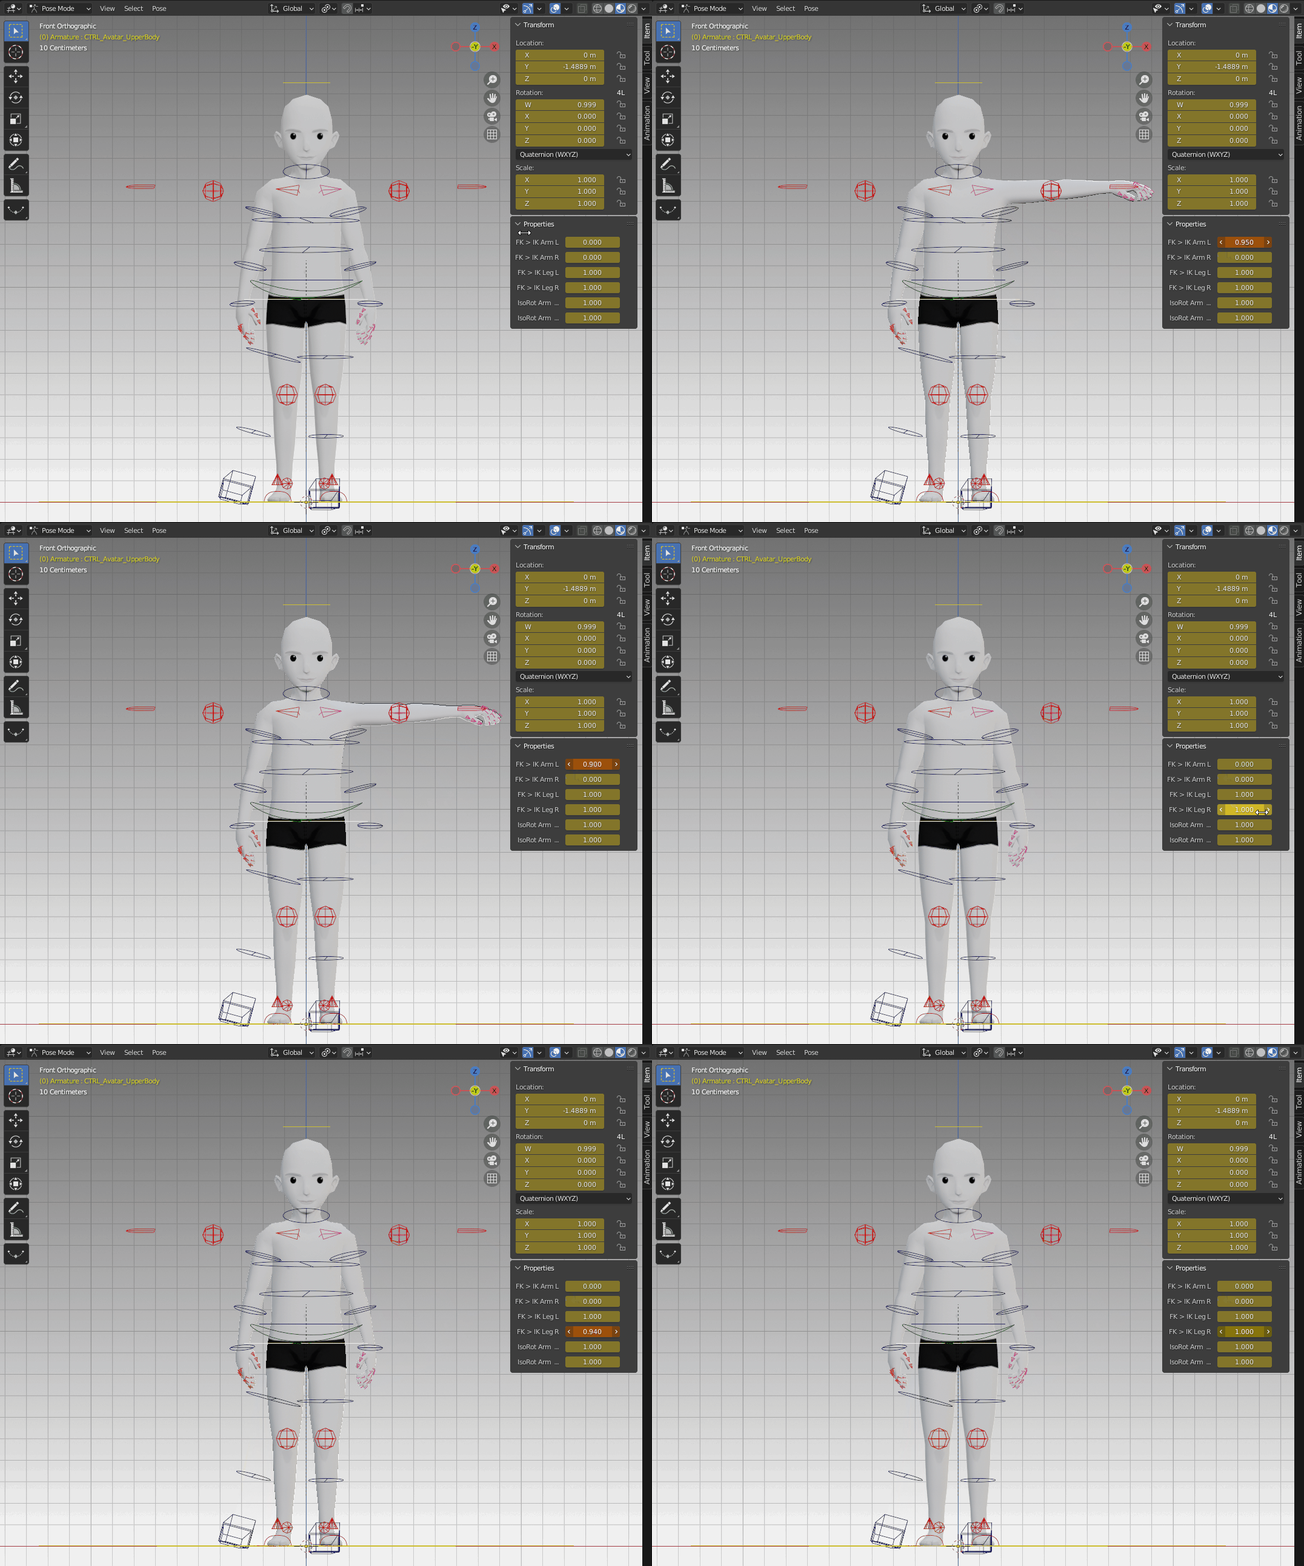
How the FK > IK Switch works.
Isolate Rotation FK Blend #
Another custom attribute in the UpperBody control is the isolate rotation, that allows you to choose if the bone will inherit its parent’s rotation or not (while in FK). While at 0, the bone won’t inherit the rotation, while at 1 it will completely follow the parent’s behavior. Any other value in between will be a blend of the two. This is an interesting tool because it causes the FK bone to maintain its position, behaving a little like an IK.
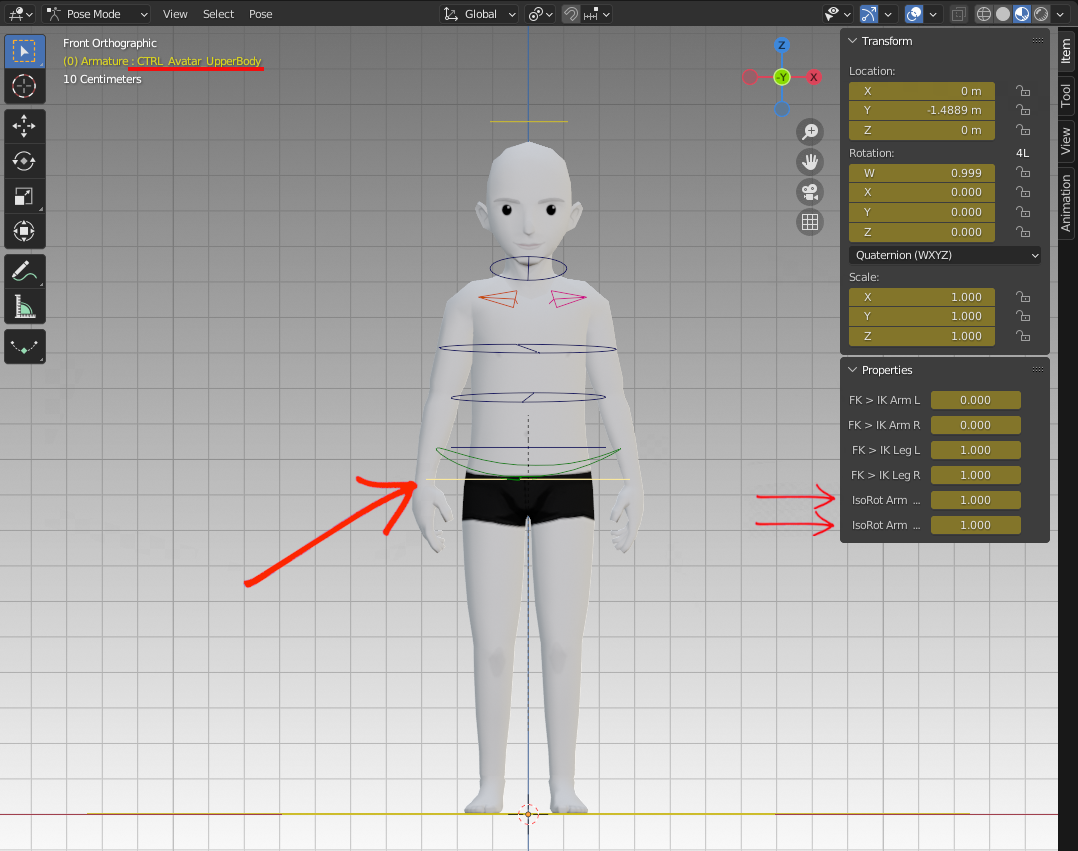
Isolate rotation attribute for arms.
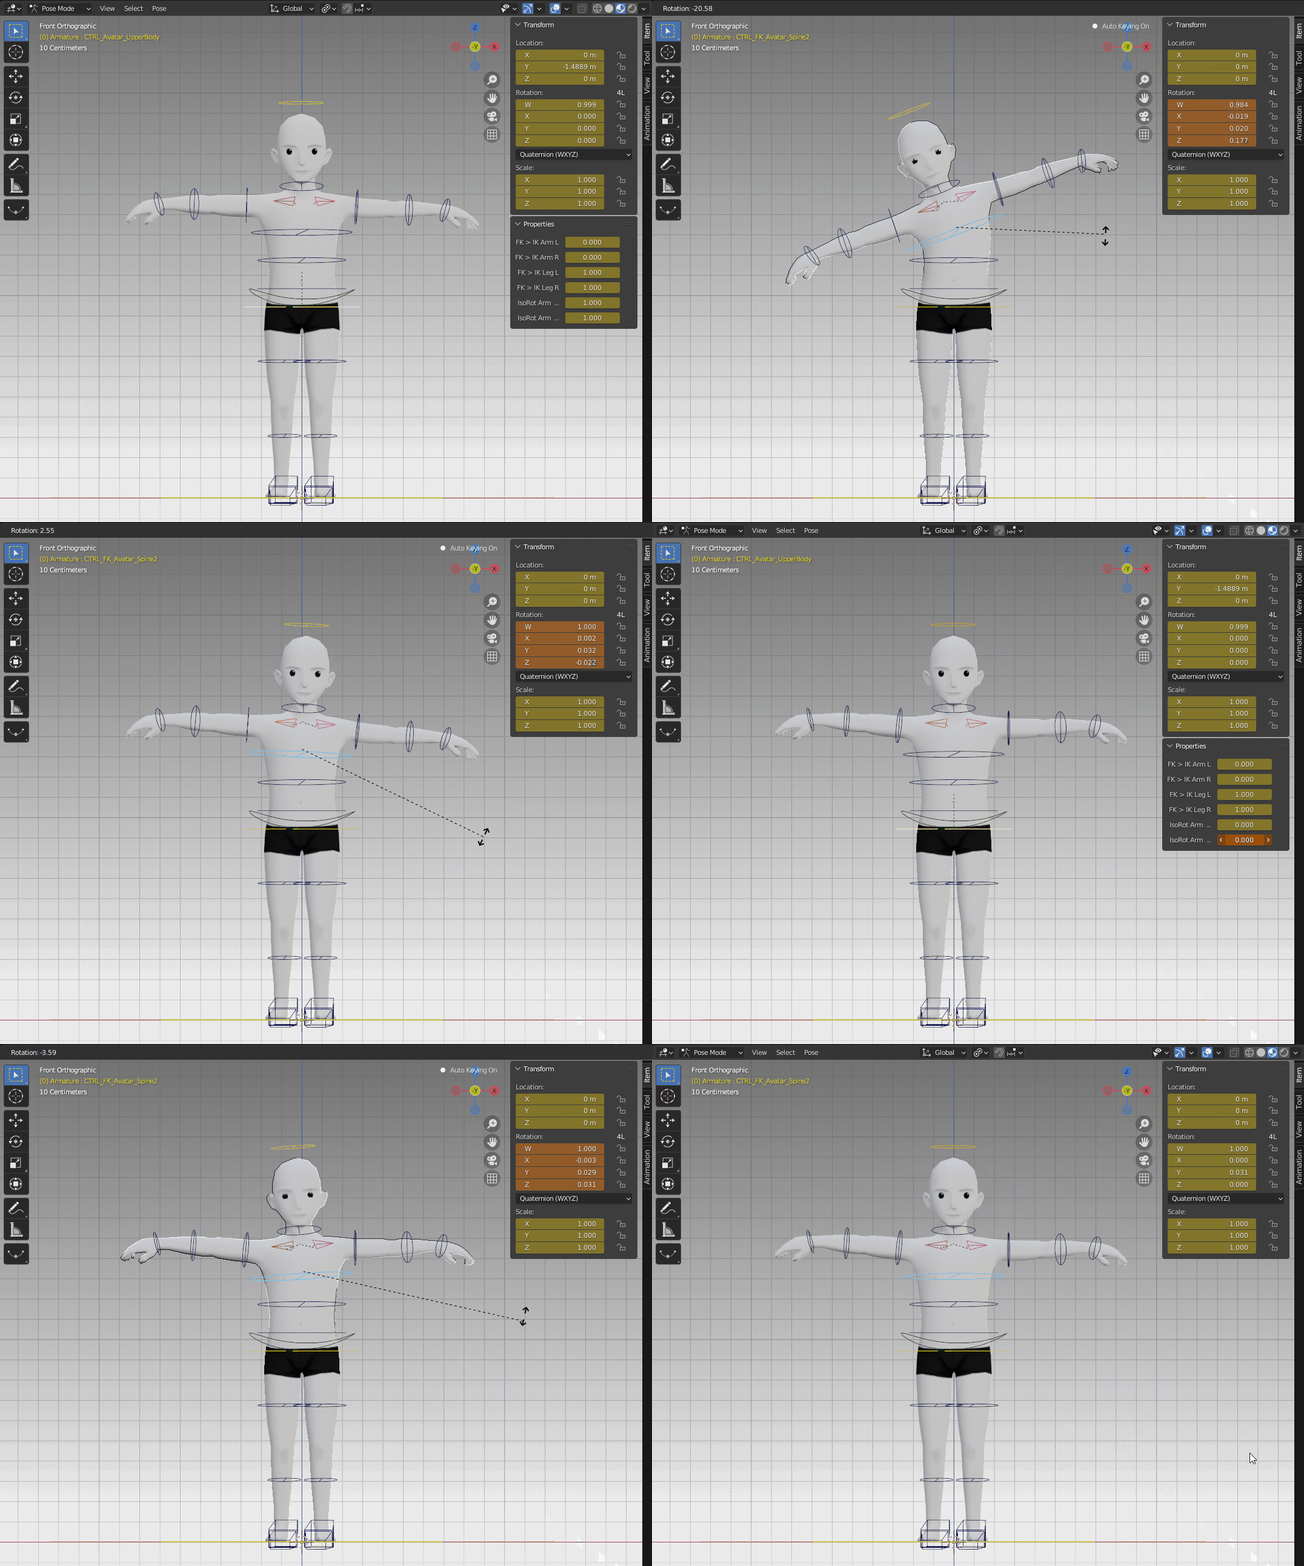
How the IsoRot attribute for the arms works.
The Head control also has this attribute. It’s really helpful for walk cycles, for example, since the head will keep its rotation even though the torso is twisting, making sure it’s always looking forward. Without this option, the animator would have to manually rotate the head every time the torso twists in order for it to be straight and look forward.
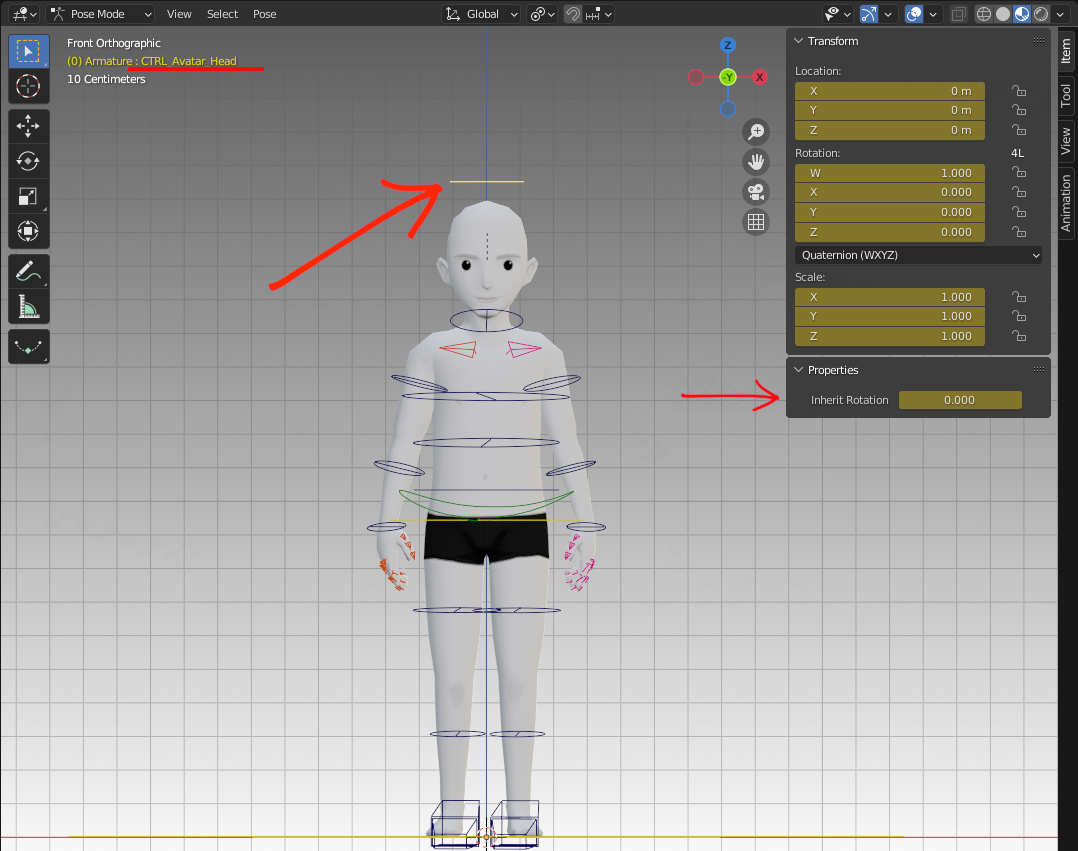
Isolate rotation attribute for the head.
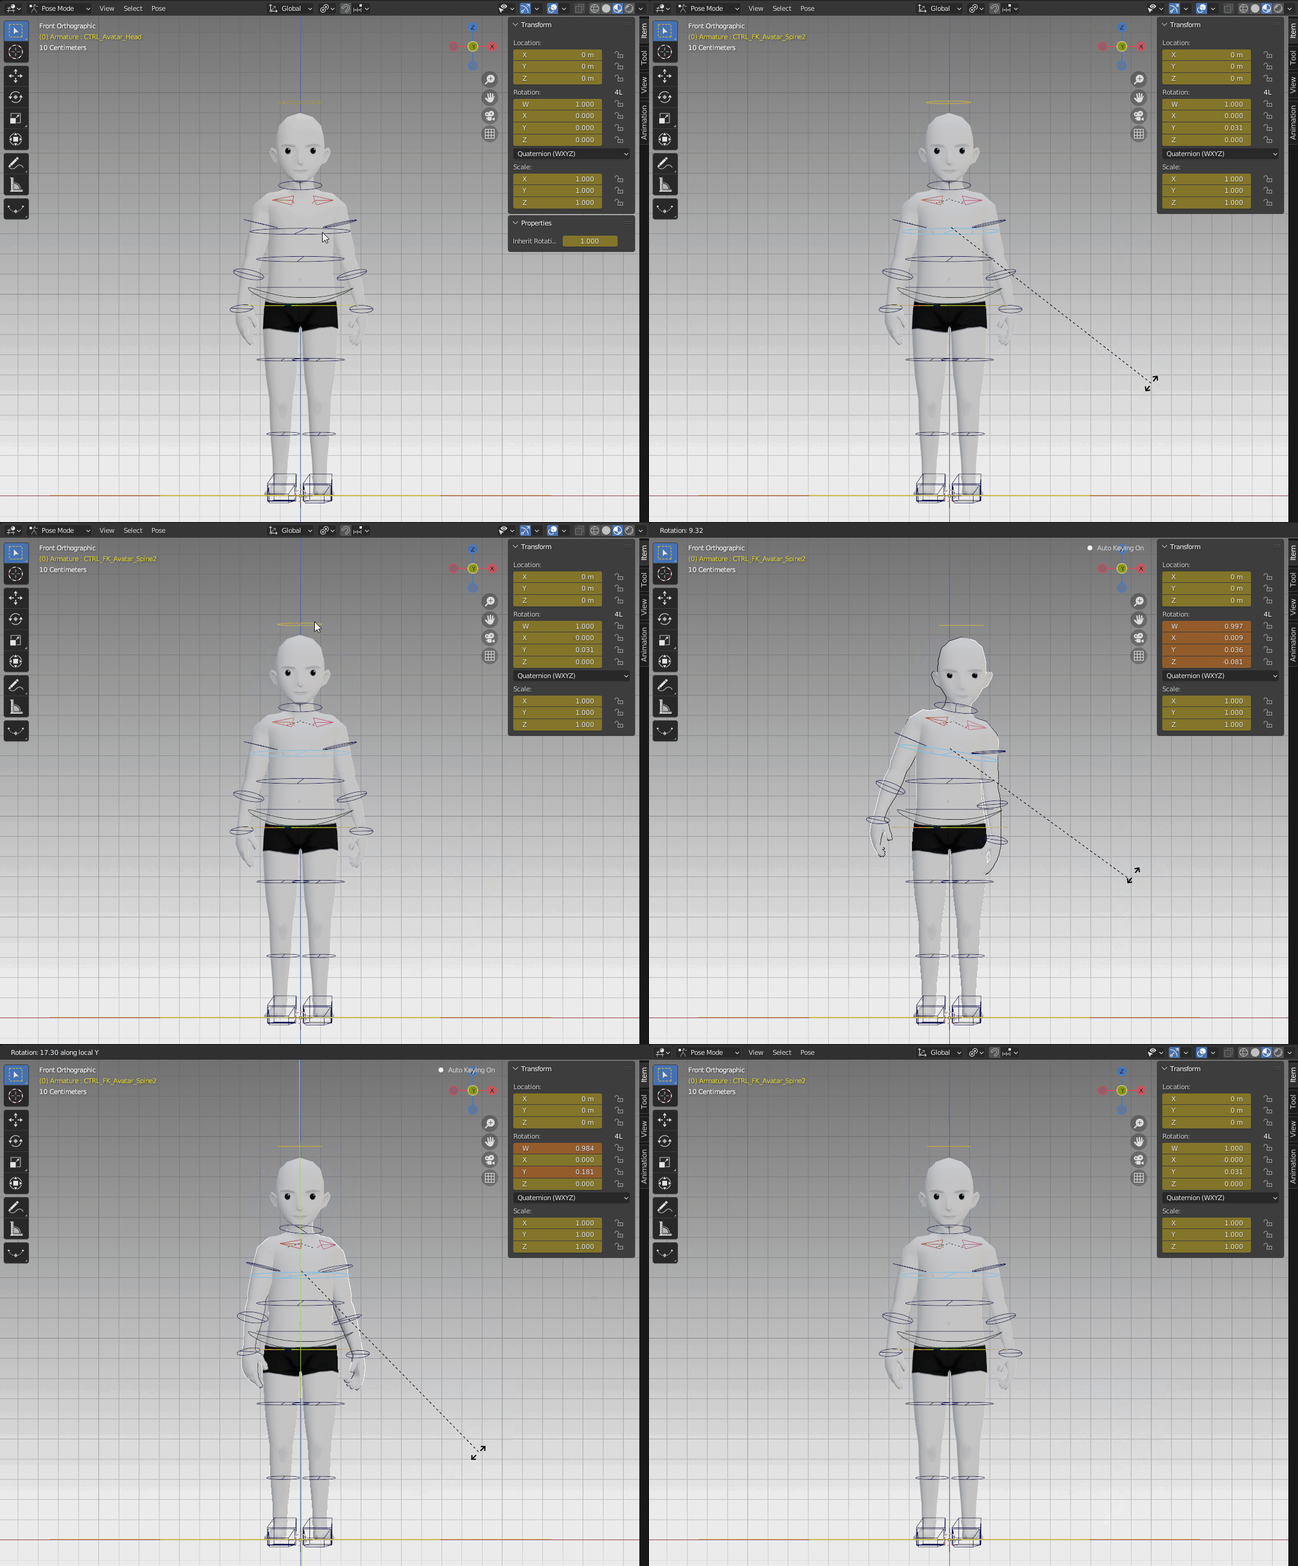
How the IsoRot attribute for the head works.
Warning: When animating, even if all controls have been selected and key framed, these custom attributes won’t be automatically key framed. Make sure to manually insert a keyframe in each attribute so you don’t lose the pose/motion you created or, in Blender 3.1, press I, then select Location, Rotation, Scale & Custom Properties.
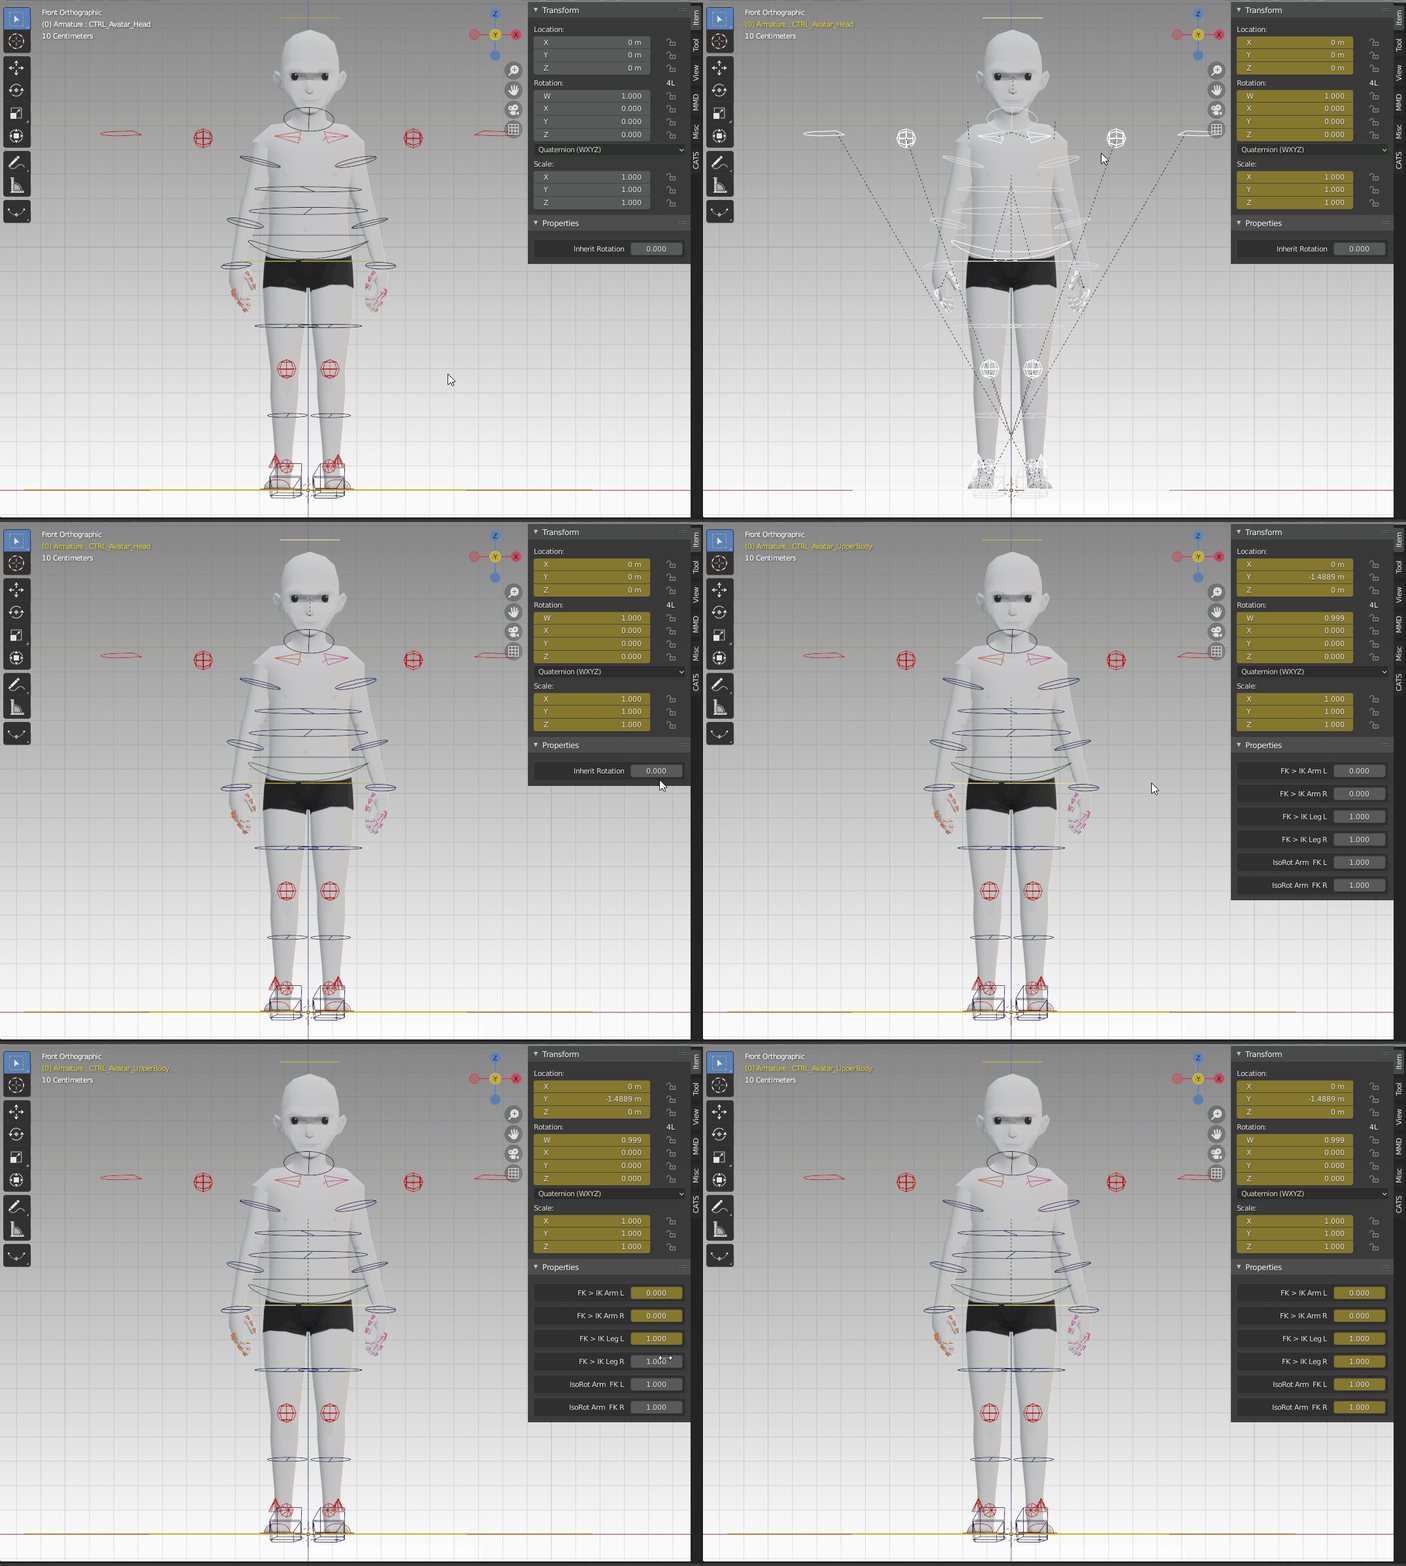
In previous versions of Blender, make sure to keyframe all the controls and custom attributes!
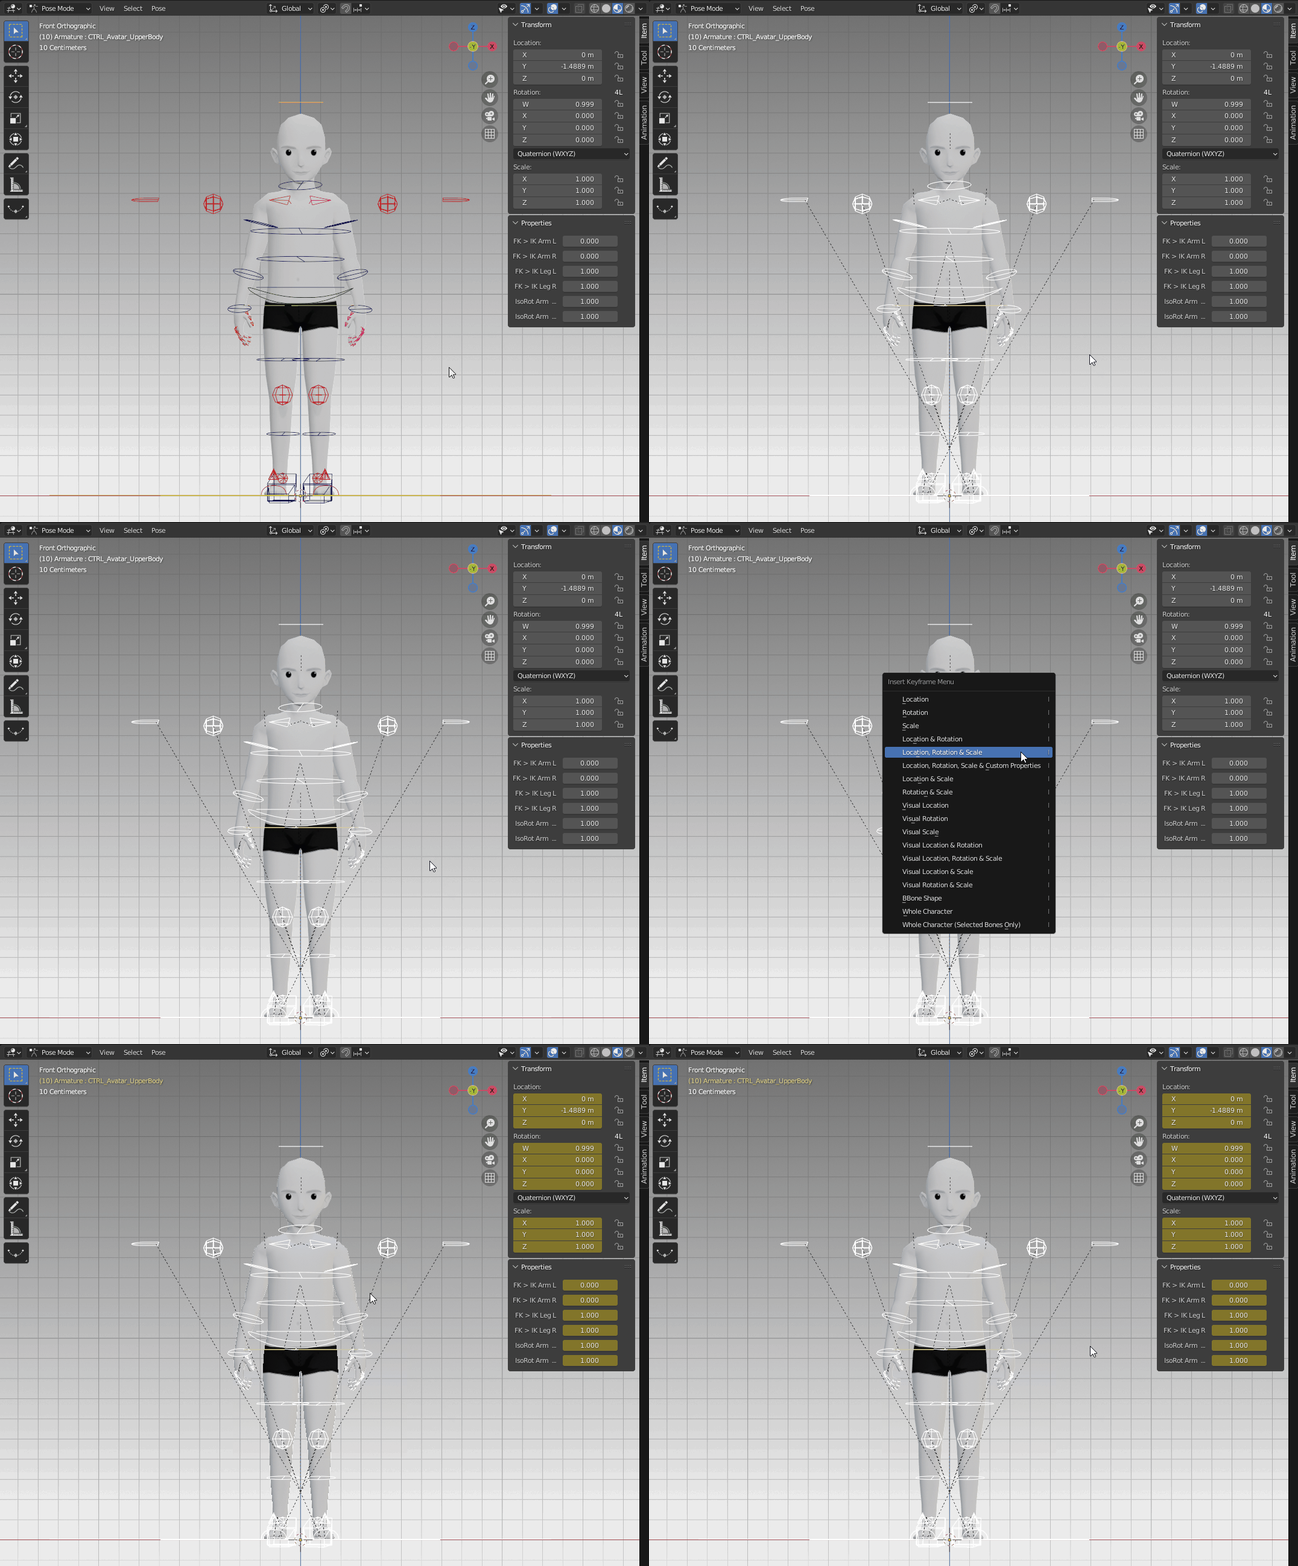
In Blender 3.1, to keyframe custom properties, press I, then select Location, Rotation, Scale & Custom Properties.
Another solution for keyframing custom properties is selecting Keying under on the Timeline tab and on Active Keying Set select Location, Rotation, Scale & Custom Properties, like shown on the gif below. That way, everytime you press I, a keyframe will be created without the pop-up menu. Since some animators prefer the menu, by default, that option is not enabled. But feel free to choose the method that suits you best.
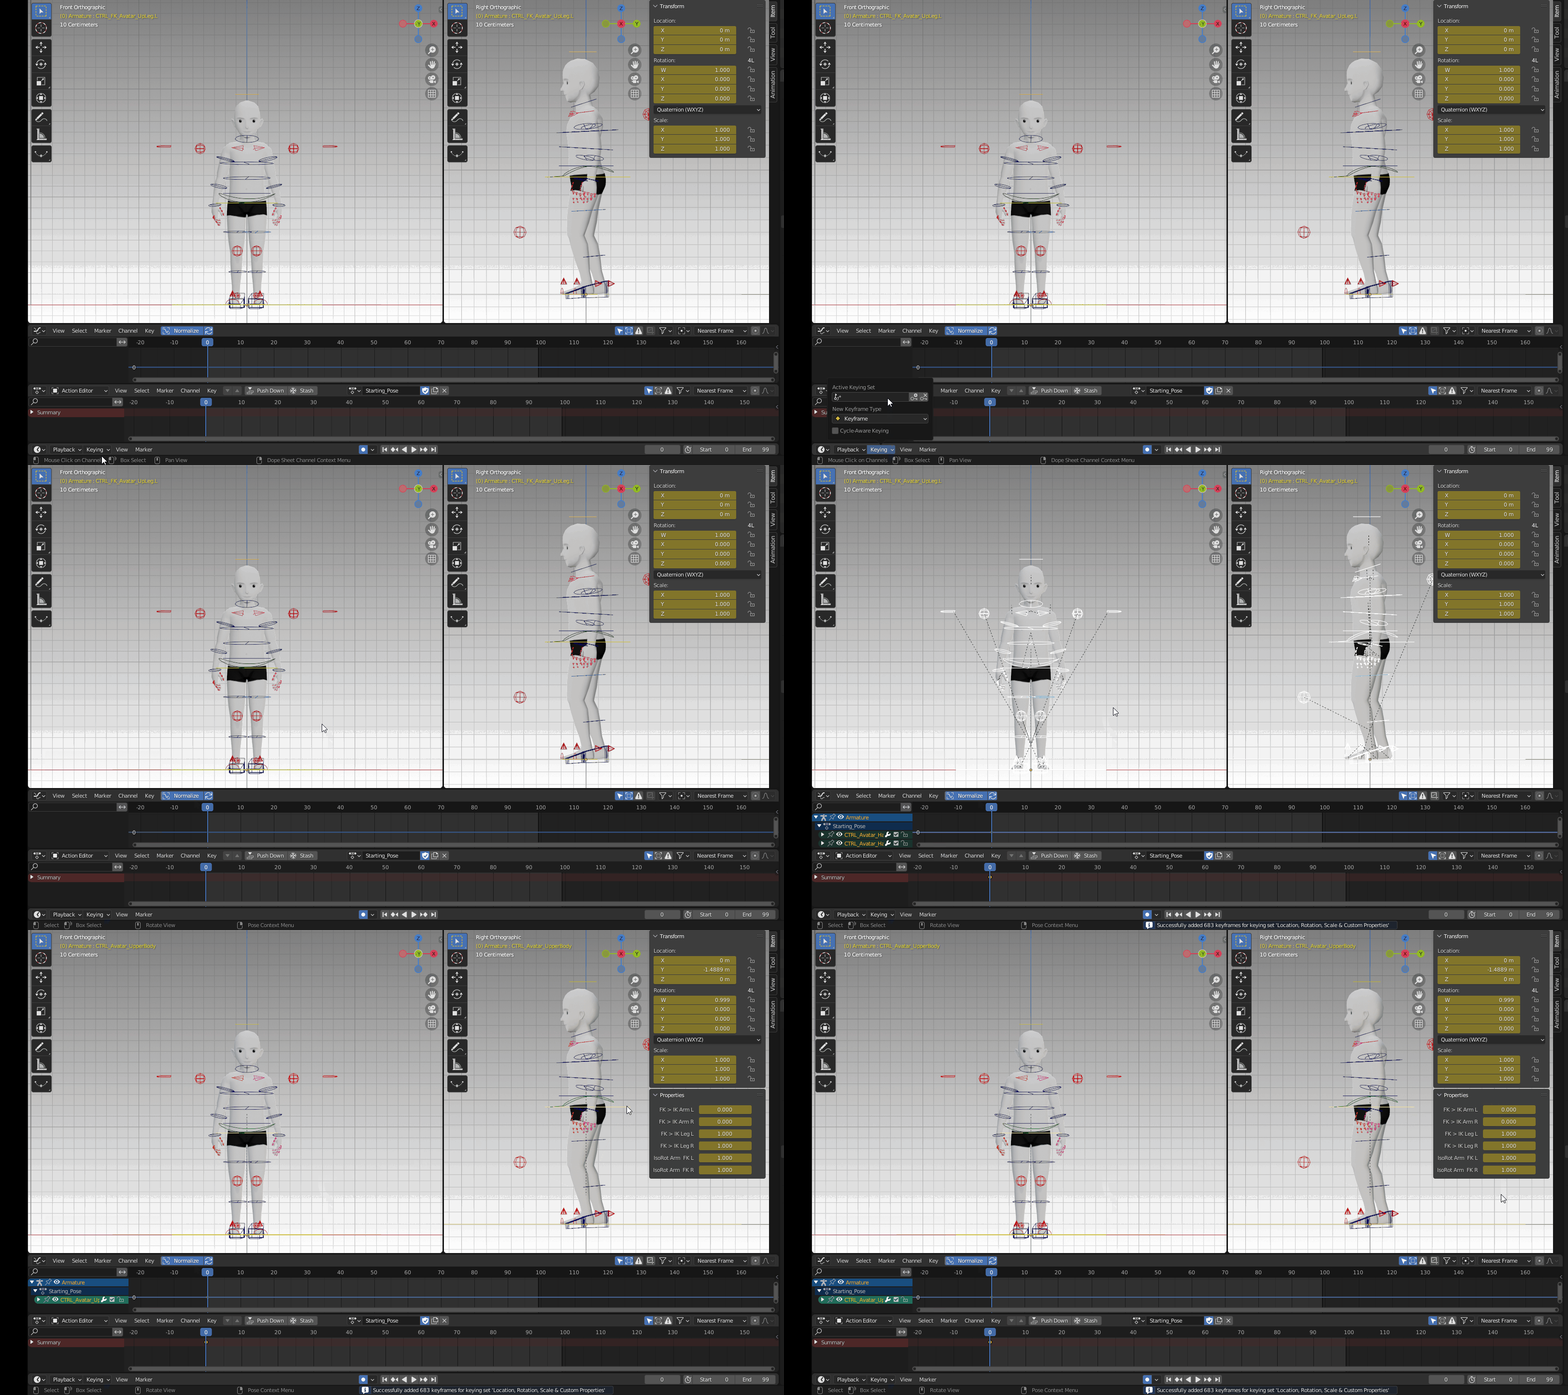
Keyframing with the Keying option.
Reverse IK Foot Setup #
Animating an FK foot is pretty straightforward: just grab any of the controls and rotate it. Since there’s a control for the foot and another for the toes, the animator has full control over the movements. However, for the IK it’s not so simple. The foot has to stick to the ground, while also being able to rotate on the ball and heels and side to side.
This rig was set up in a way to give the animator freedom of foot movement without losing the advantages of the IK system. It consists of four controls:
- Foot roll: this control rotates the foot back and forth and side to side. To avoid bending too much on the heel or too much on the ball, a limit was set so the foot rig doesn’t break. When it reaches this limit, the foot will stop rotating.
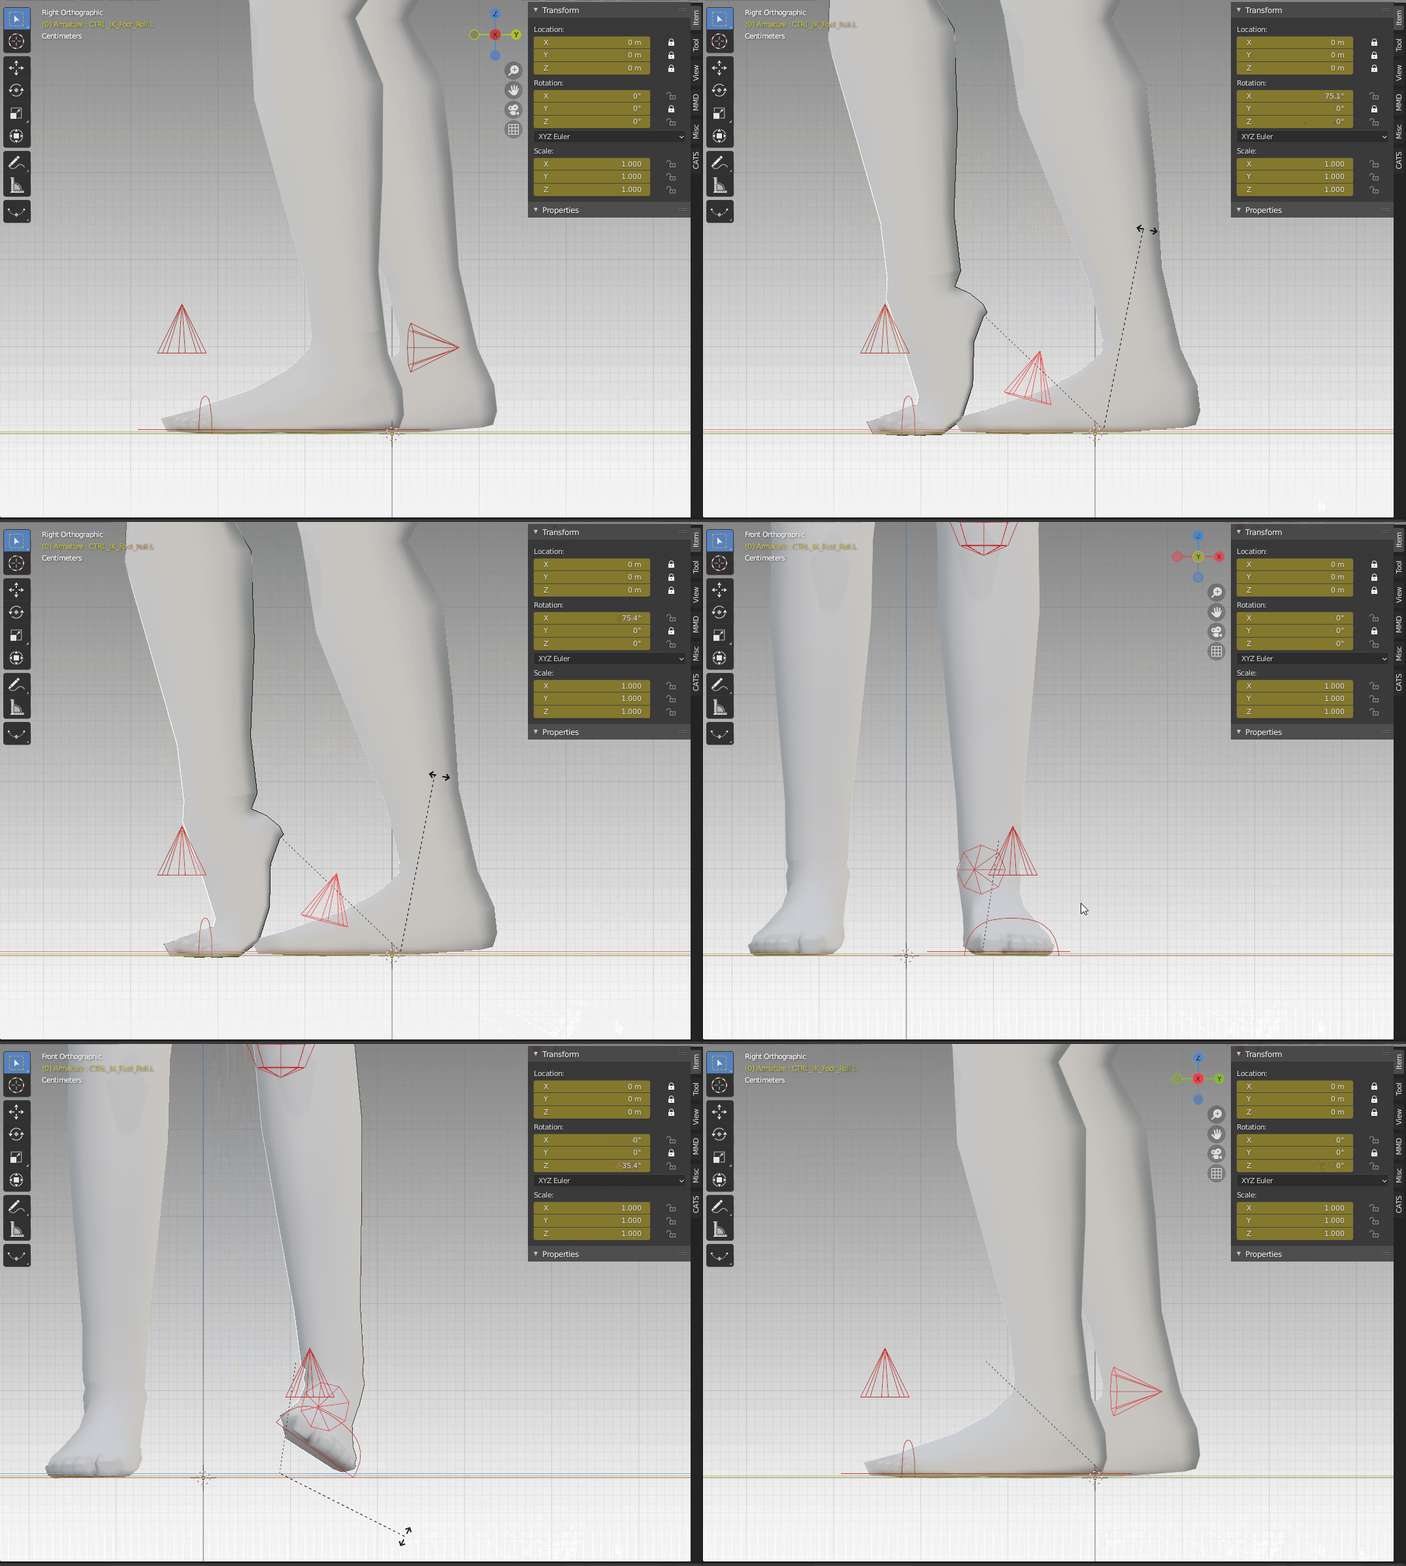
Foot roll: rotate in X and it moves back and forth; rotate in Z it moves side to side.
- Toe tip roll: rotates the foot from the tip of the toes. It only rotates forward.
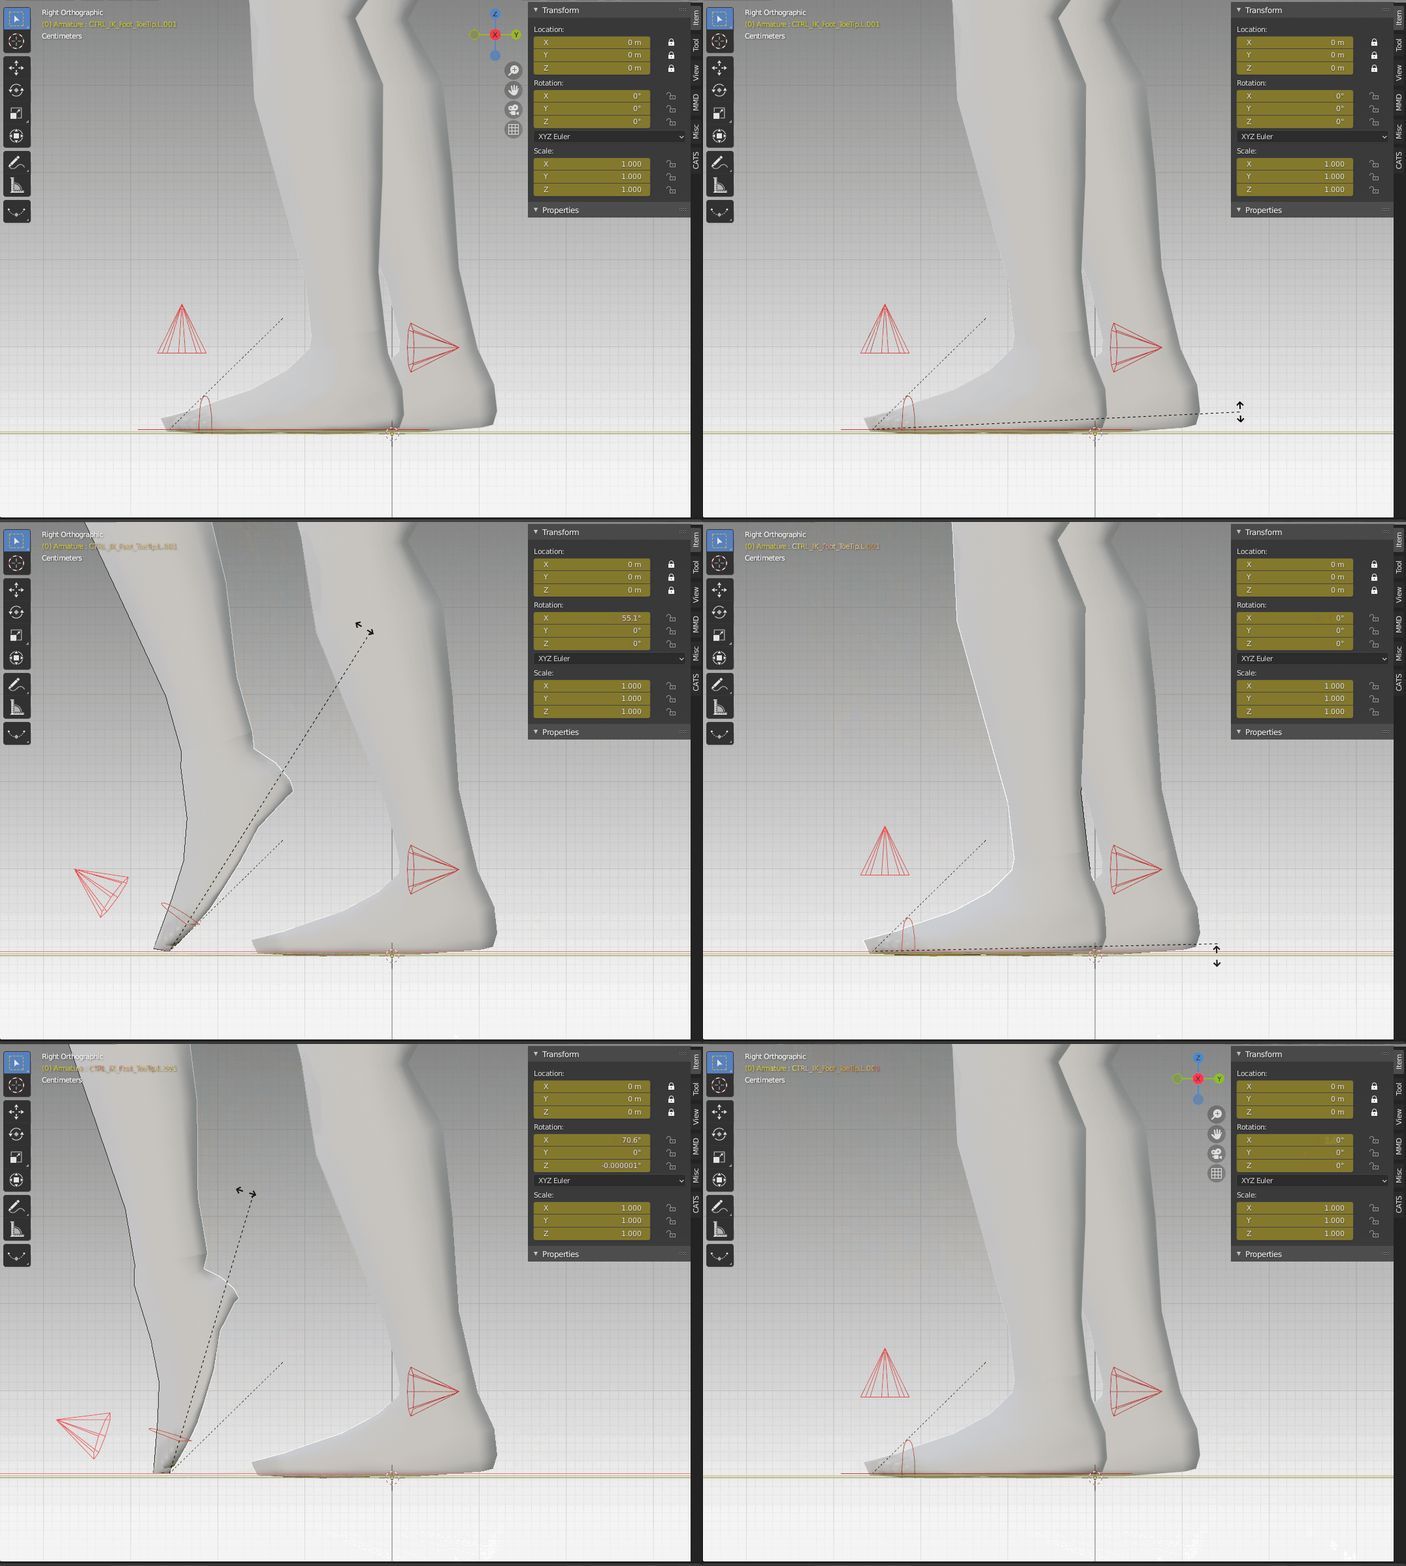
The toe tip roll only rotates in positive X.
- Toes control: rotates the toes from the ball.
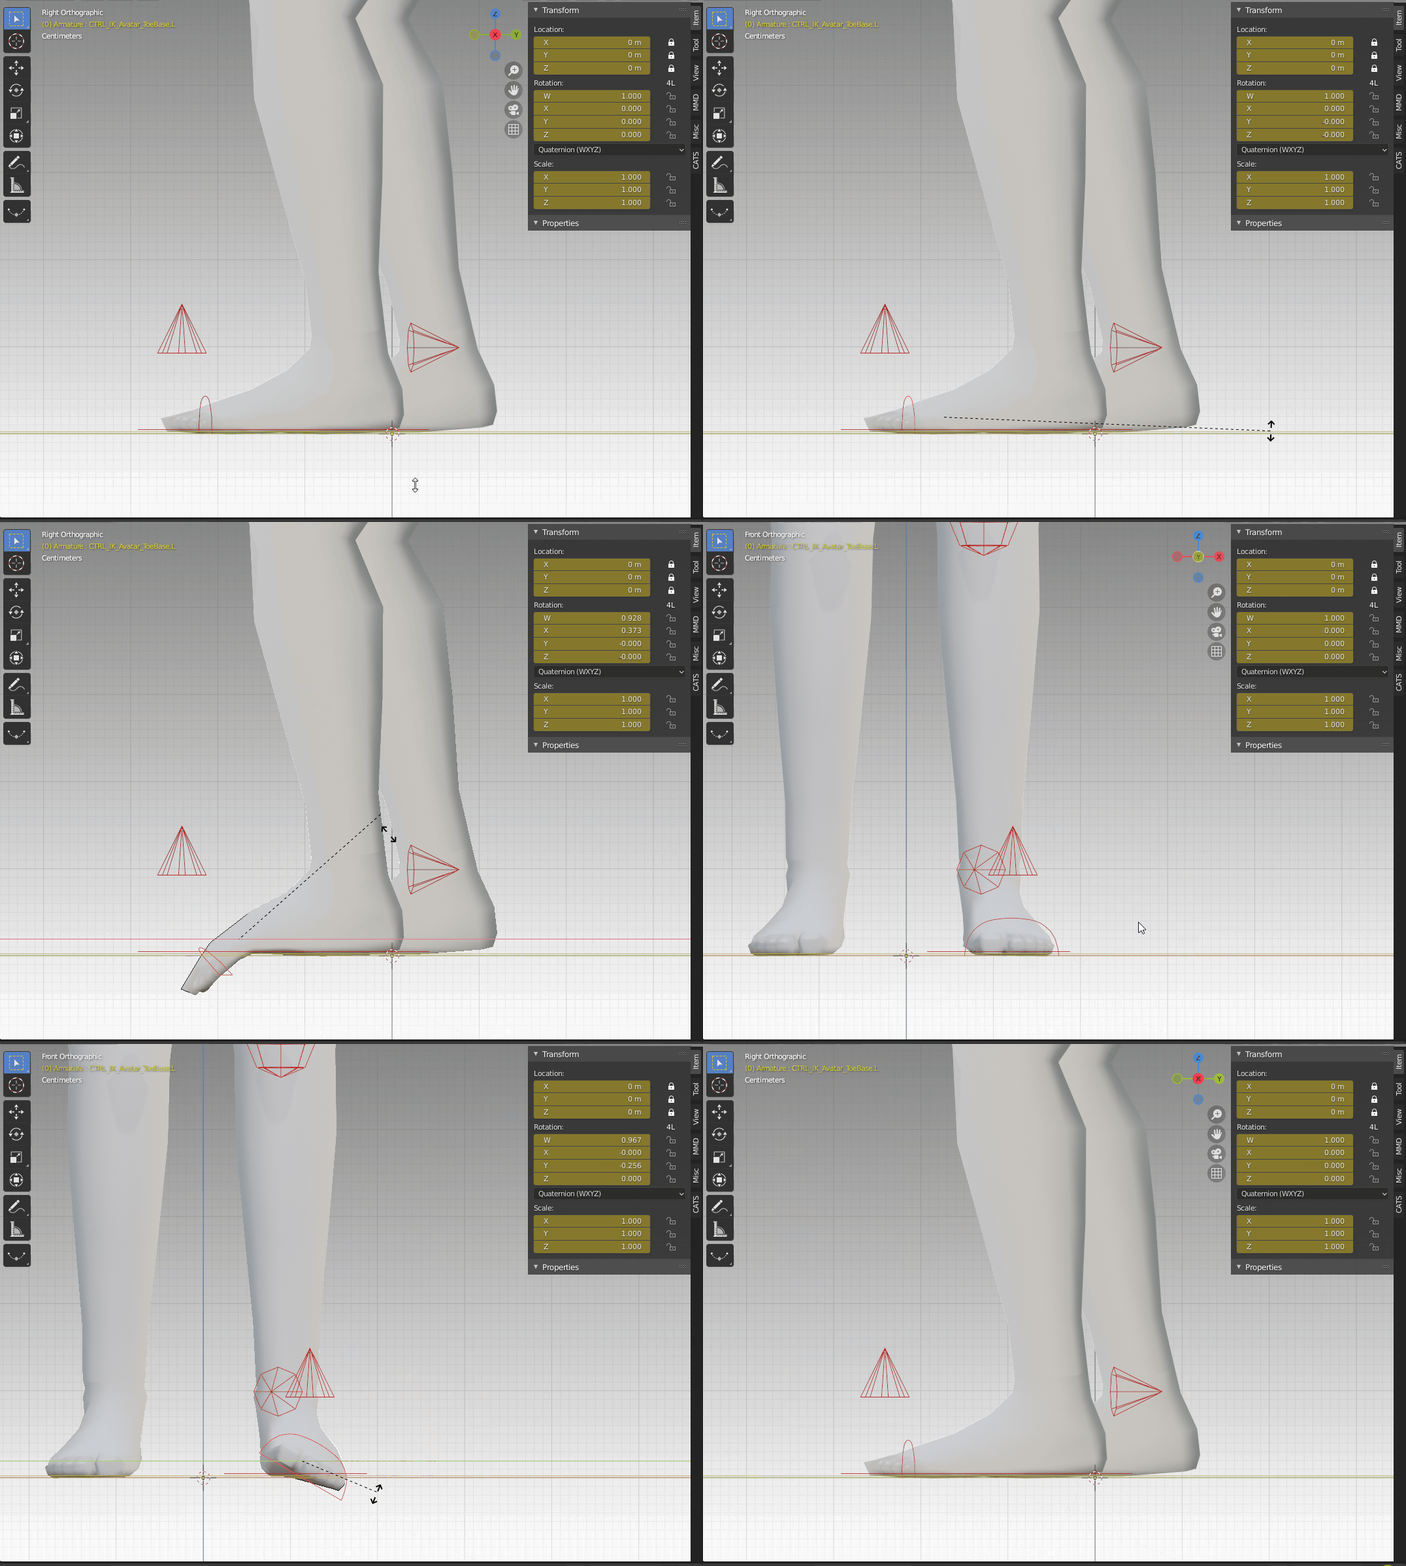
Toes can be rotated in any direction.
- Foot control: this is a global control that moves the foot as a whole. Since it’s the parent of all the other foot controls, it’ll keep any transforms while also being able to be grabbed and rotated.
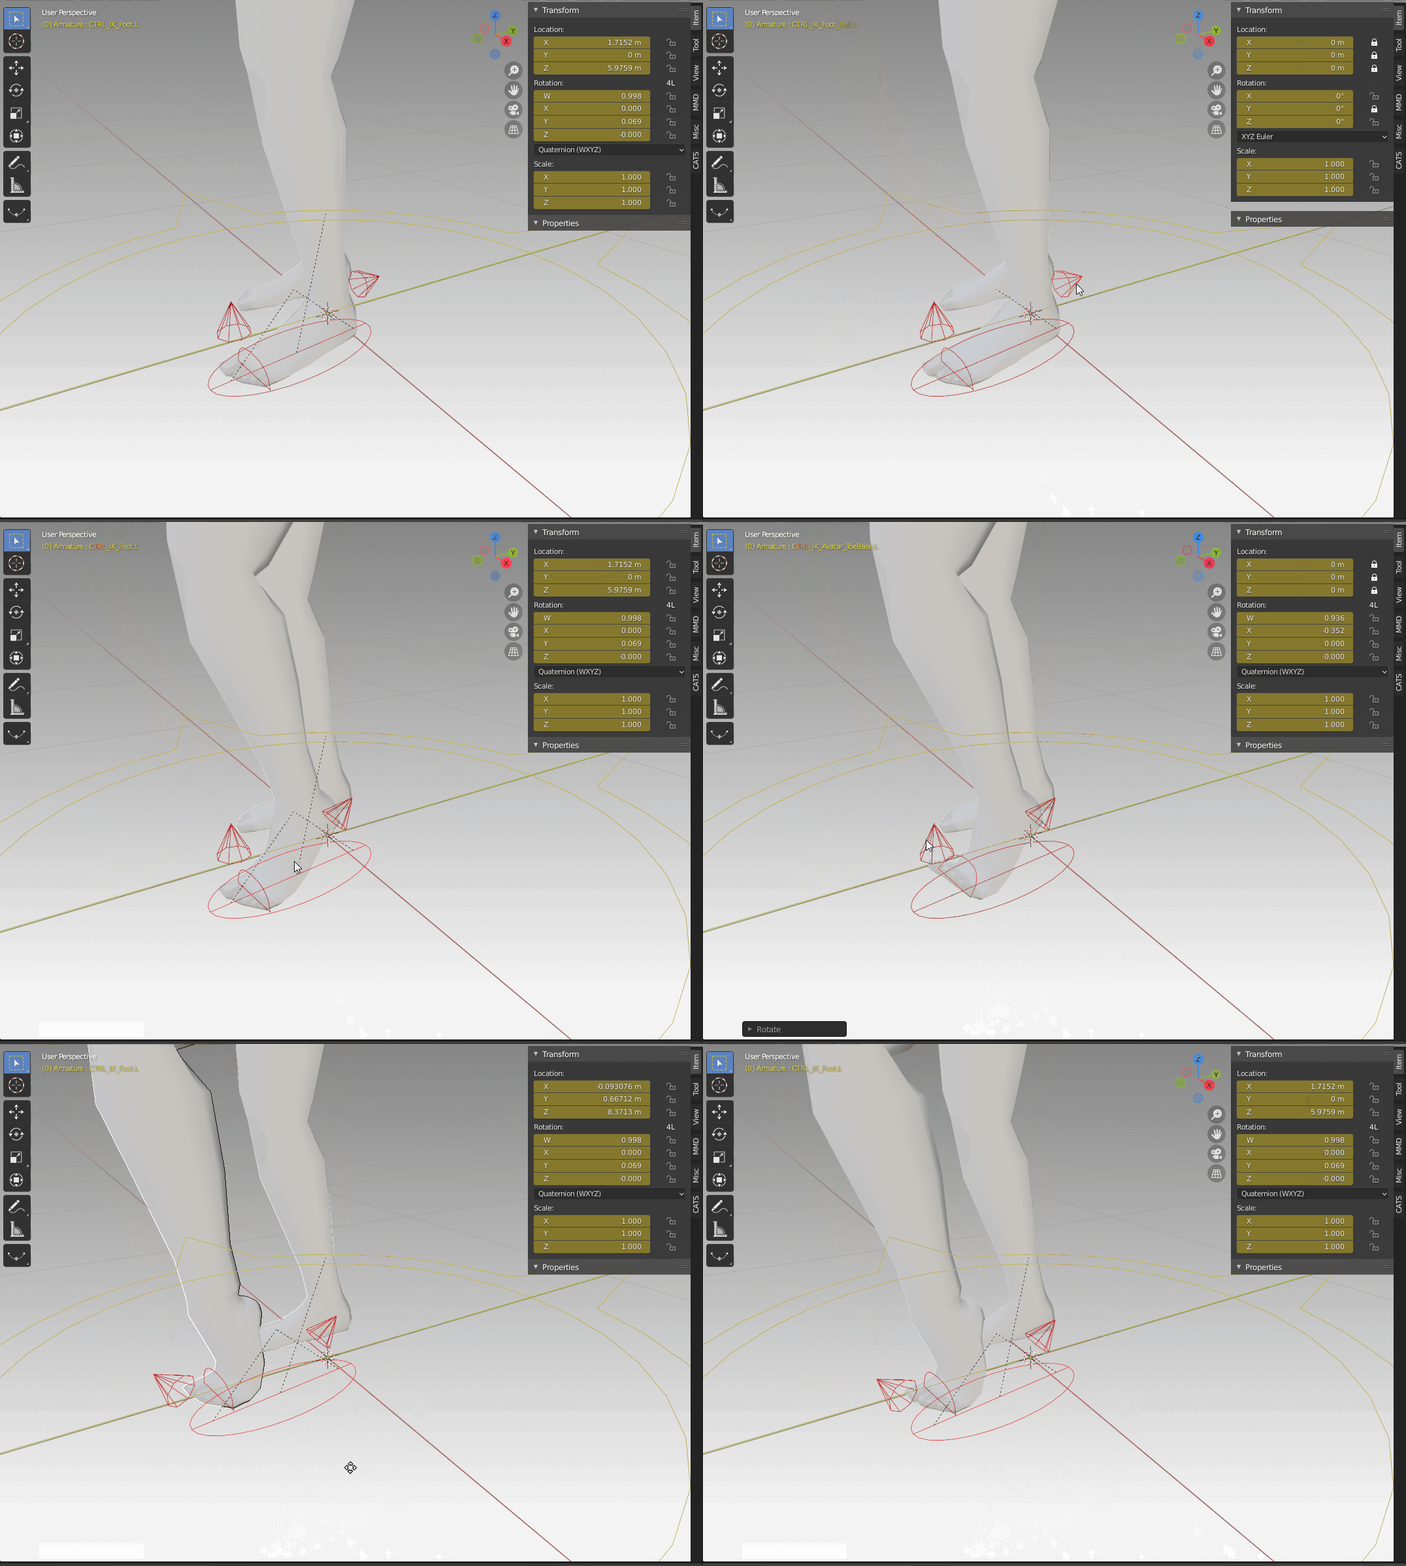
How the foot control works.
Locked Transforms #
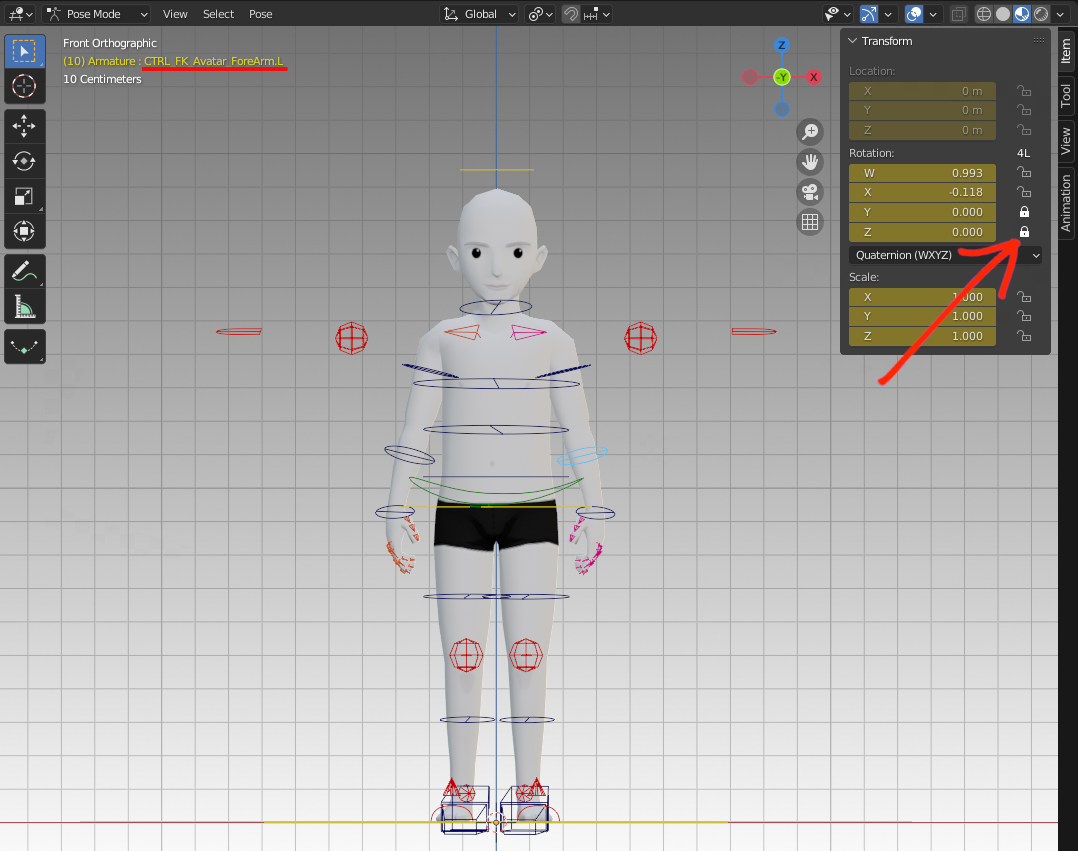
Some controls may have a lock symbol next to the transforms parameters, which means that those values can’t be changed. This was done to controls that should only behave in a certain way and to avoid any unwanted transformation. For example, elbows and knees are meant to rotate on just one axis, which in this case is X, and so the other axes have been locked. Other examples of controls with locked attributes are IK elbows and knees, fingers, foot roll, and toe tip.
It is advised to keep these locked, but in case you want more freedom of movement, just click on the lock icon to unlock it.
